I’ve got a real buzz about the Beneath the Lily Banners rules at the moment. With a game arranged at the club, I thought I’d try another solo game by way of preparation.
I’ve had a few of Barry Hilton’s 4Play scenario booklets for a while. I had primarily bought them as source material. I thought I’d give one of them a try.
The general idea is that each side has 4 units, you play 4 turns and it’s all on a 2’x2’ playing area. I chose to have a go at the Celts at Dunadd scenario.
As you can see they’re nicely presented and an after game report is included for each scenario.
Turn 1: only a small smattering of orders available. The government commander, Auchinbreck is a ‘plodder’ so all his order allowance rolls are downgraded, poor chap.
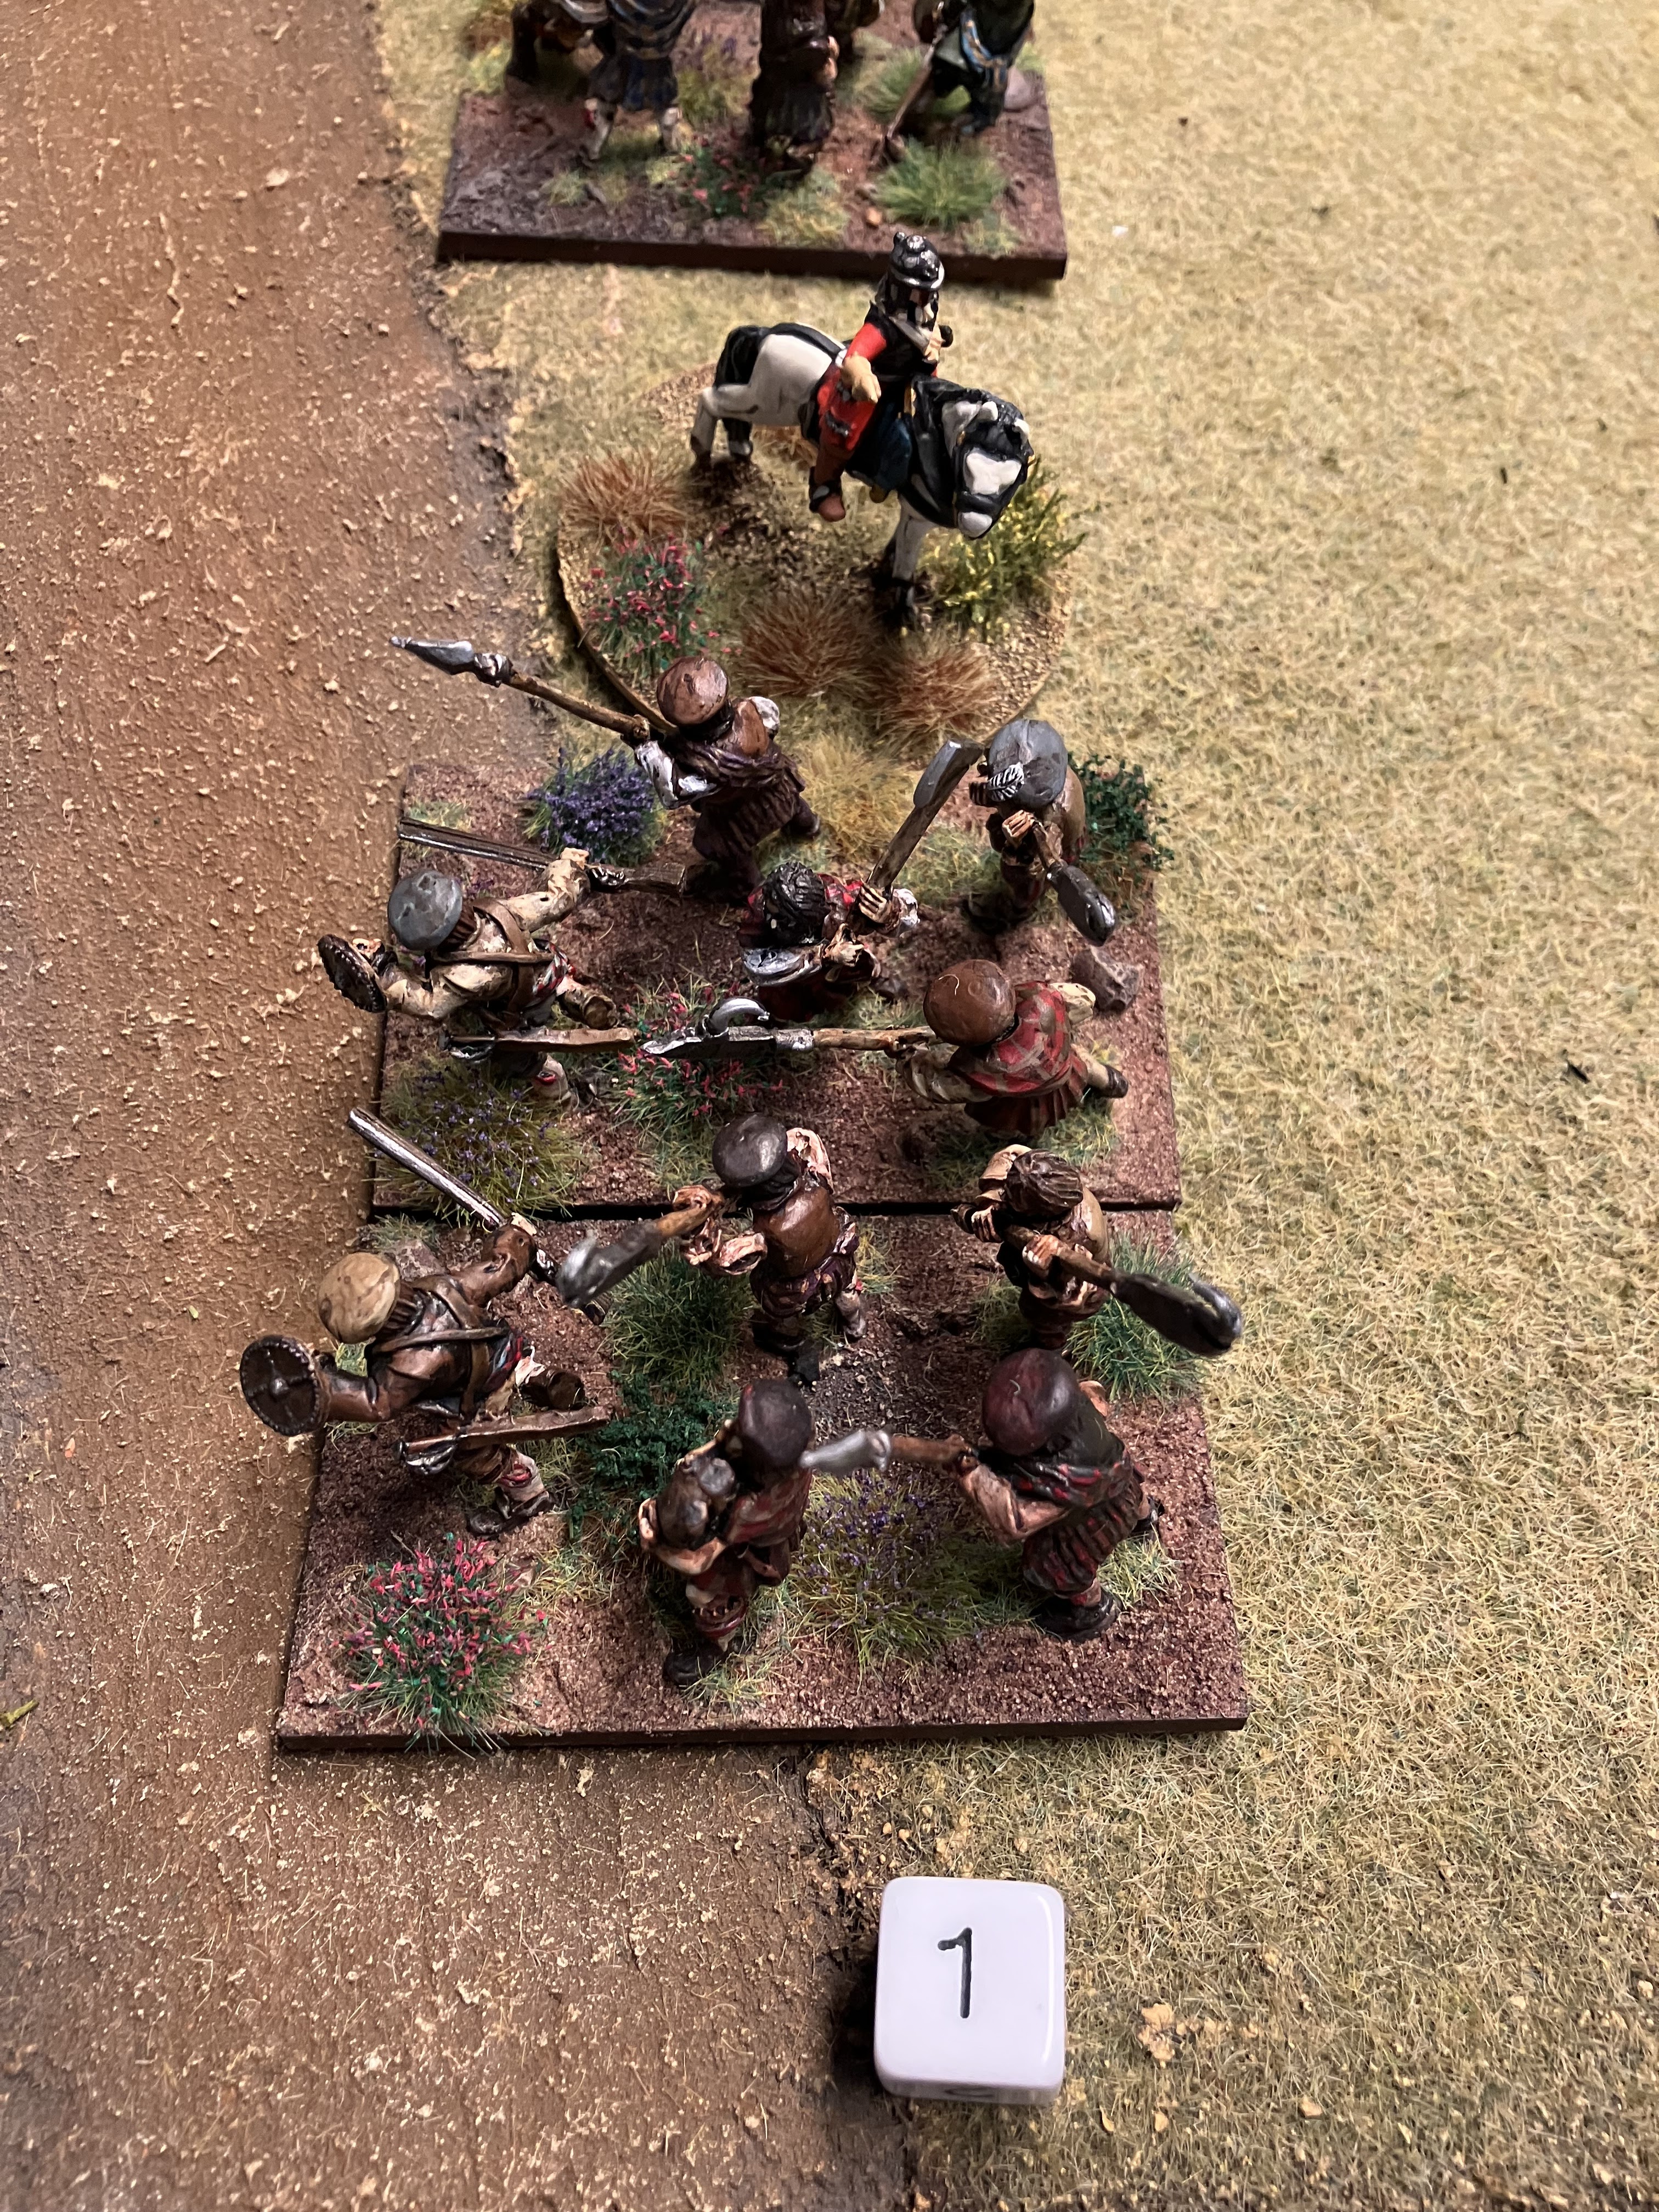
The Irish engage the Argyll militiamen in the steading whilst most of the Campbell clansmen advance down the ridge and Piper McCrimmon encourages Jacobite clan recruits forward to meet them.
The militiamen cause 3 casualties on Alexander McClean’s Irish whilst receiving 1 casualty. In hindsight I should have advanced the Irish to short range before giving first fire, but live and learn. Better still, I reckon the Irish would have had the best of it in close combat!
Turn 2: the prospect of some close combat dissolves as the Campbell clansmen throw a series of 1s. Instead of charging down into the traitorous Jacobite recruits they refuse to charge then retreat as a response to being charged.
Meanwhile Buchan’s Irish cease fire to advance closer to the steading (I made this unit raw and McClean’s drilled out of personal preference). The musketry is proving ineffective. Did I mention I should have played the Irish attack differently…? Live and learn…!
Turn 3: Auchinbreck goes to rally the retreating clansmen. Another 1! The retreat turns into a rout! The clansmen still loitering by the cross are unfazed by the departure of their kin or their CinC.
Meanwhile on t’other side of the steading, where ineffective musketry continues, men of Bute close on men of Kintyre.
Turn 4: With Piper McCrimmon out of puff, the Jacobite clansmen fail to get up the ridge to attack the loyal clansmen by the cross who were shaken by the idea of charging themselves.
Bute vs Kintyre on the other side of the steading results in a close combat and the Jacobite recruits from Kintyre lose and rout.
And still no resolution between the Irish and Campbell militiamen. I did play a 5th turn to see if I could reach a conclusion. The firefight at the steading reached the point of 3 casualties in each unit engaged. Auchinbreck returned to the battlefield, with my permission, and led the loyal Kintyre men down the ridge to send Piper McCrimmon and that unit of rebellious clansmen routing off the battlefield. (In my excitement I’d forgotten that shaken units can’t move or charge.)
The Bute clansmen reformed to threaten McClean’s flank.
So with 5 turns played, the Jacobite position was looking untenable. All the gathered recruits had fled, the Campbell militiamen held the steading and both flanks were open to attack by Campbell clansmen. I’d well and truly fluffed this one for the Jacobite cause!
After getting the figures out ready for the game at the club, it was time to have a think. I was surprised that BLB gave a narrative game. I guess it’s because the 4Play concept is for small scale games. So maybe I shouldn’t have been surprised. I do like a narrative game.
I wish I had played the Irish attack on the steading much differently. That’s no reflection on the rules obviously, just me being a poor tactician! The 4Play format is so quick play that it would have been easy enough to play the game again. It had only taken an hour and a half to play 5 turns solo including leafing through the rules to make sure I’d understood things correctly.
I think even with a full sized game, BLB can include a lot of narrative with things not going as planned and the risks involved of getting characters and commanders involved in the action. See how the next game goes!
Roj Castle and I played a straightforward game at the East Leeds club. Having more than just my own experience of BLB to draw on proved to be a great help.
Both sides are similar in that there are two brigades each of foot and horse and a small piece of artillery. The Jacobites have an advantage with the cavalry whilst the Williamites have an advantage with the foot. Each in quality rather than quantity.
Still a small game by what the rules can handle, but ample forces for a couple of hours’ entertainment.
Roj does a fine job with his cavalry on both wings. With his drilled blade horse on the Jacobite left wing he carries out an “all or nothing” charge which easily overwhelmed the single bullet squadron I’ve sent forward to engage them (failing to contact when they charged and ending up disordered as a consequence!).
On his right Roj has a veteran-elite blade squadron backed up by two raw bullet squadrons. The combat goes to a second bound and I support with my second bullet squadron. The Williamite raw cavalry choose to watch from a safe distance! They’re not needed. Both of my squadrons rout.
The Royal Fuzileers give the Jacobite left wing horse a volley. At extreme range, it’s of little consequence. The cavalry “form back” to reform at a safer distance.
With the veteran-elite squadron spent from its exertions (its usefulness evaporated when Roj rolled a 1 to initiate them charging the Williamite gun!), the raw Jacobite horse are sent forward. Roj tries to catch the left of my infantry line in the flank. However his horse decline to charge and the Huguenot foot turn to face the threat. To add to their woes, the Williamite gun starts causing casualties amongst the two squadrons.
The Williamite infantry are slowly closing. Roj put all of his foot on defend orders as soon as he could. That was a lesson learnt! I’ll come back to that. One effect was that I needed to advance to bring us all within musketry range. By the time we needed to call it a day, one of Roj’s foot had given an ineffective volley at extreme range and his gun had popped away without causing any casualties.
Roj consolidated his two depleted squadrons on his left into one. In doing so they drop from drilled to raw. They then proceeded to charge, fight, rout and capture the colours of my squadron! Rude I tell you.
It’s time to pack up. With enemy cavalry on both flanks, I feel that the Williamite position is untenable. Roj thinks that given another hour’s play, the Williamite foot would most likely have carried the day. Most of the Jacobite foot is raw. All of the remaining horse is raw. So perhaps it was all still to play for.
I found it great fun! Lots of food for thought.
We used a couple of aspects of the rules I’d not tried. Roj carried out an all or nothing charge, which was devastating, and successfully consolidated two depleted squadrons of horse.
I discovered that reinforcing defeat is not a good idea. Surely I knew this already?! It was abundantly clear when I fed a fresh squadron into the combat that I was losing and consequently lost all of my horse on the left wing!
Roj’s main concern is the movement. I’m still of the opinion that infantry in line moving 4” is fine. I followed what Barry has for a pick up game in the rule book so the two sides were deployed 36” apart. Where one side’s battle plan is to stay put and wait for the enemy to come at them, there’s a couple of hours before the fighting starts! Obviously there is no hard and fast rule as to how you need to deploy. If I remember correctly, in Barry’s scenario for Killiecrankie the opposing armies start 18” apart. To put that into some context, extreme musketry is 12”.
What we could try is a tactical move. Say, if troops remain outside of 18” of any enemy they can make a double move on a movement order. Maybe have everything making a tactical move in column, but that would require a form order to change from column to line? The 18” seems reasonable being over a cavalry charge (10+d6”) and beyond extreme musketry range.
Otherwise just start closer!
Early on Roj put all of his infantry and the gun on defend orders. This gives them a morale bonus and a musketry bonus for the infantry. However it also removes all of those units from the potential order allocation pool. We quickly realised that as well as getting the bonuses, you’re also effectively surrendering the initiative. With the majority of Roj’s army on defend orders it made it difficult to get the cavalry doing what he wanted. He stuck with it for a while, but eventually sent officers to the foot battalions to take them off defend orders.
It did make me rethink my previous idea of unengaged troops getting ordered automatically whilst only engaged troops are subject to the order allowance rolls. This will result in the orders being restricted for the troops closest to the fighting. They have the greatest need for orders. So I’m binning off that idea.
I might have to approach large multiplayer games the same way I would approach a show participation game; strip the rules down. The order allocation rules are an important aspect of BLB, but I might need to give players the ability to order all their units every turn. There would still be the fog of war with all the morale checks.
Apologies! Lots of text there and no photos! There’s Eustace’s and Lord Louth’s foot for you good folk. Painting by Roj Castle and Steve Shann. Photograph by John Daybell.
A bonus game! (Sorry this blog post is getting far too long…!)
Good mate Kev Moon found himself at a loose end for club night. His oppo needed to work. I proposed a game of BLB.
Kev: “I have to confess to not being much of a horse and musket person.”
So not only had he not played BLB, he was also no fan of, as he put it, horse and musket. It would test my understanding and hopefully provide me with useful feedback.
Kev chose to be Williamite. The Jacobites are advancing and have taken the only defendable location, a small steading, with a forlorn hope of dragoons. The Jacobites need to move forward to consolidate this position. The Williamites need to winkle out the dragoons.
Lord Clare’s Dragoons start banging away at the approaching Royal Fuzileers. They hold their fire to get the most out of their first fire bonus. The cavalry on both wings eye each other up warily.
The cavalry clash. On the Jacobite left, it results in both sides taking punishment and routing! After the first bound of combat, it could have gone either way, so we both committed our brigadiers and reinforced with our second squadrons. So that’s everyone on that flank running away…
On the Jacobite right, the Williamite horse receives the charge at the halt. And suffers accordingly. The remnants of the Williamite squadron retreat. The photo shows them heading off bottom right whilst the victorious Jacobite squadron stands disordered after the combat… with the second Williamite squadron staring daggers at them!
As you can see in that photo, things are hotting up around the steading.
The Royal Fuzileers have advanced to short range before firing. The dragoons return fire for a couple of moves as the stone walls of the steading provide some shelter from the superior firepower of the Williamites.
Trelawney’s battalion moves forward in support of the Royal Fuzileers and engages one of the raw battalions of Jacobite foot.
With 50% casualties inflicted on the dragoons, the Royal Fuzileers charge!


The dragoons are sensible enough to run away!
The Royal Fuzileers are in a bit of a state by now. Although one of the French Huguenot battalions has moved to add its fire, the brave fusiliers have been taking fire from Lord Louth’s Jacobite battalion. So the Royal Fuzileers seek refuge in the steading.

Meanwhile the cavalry combats are resolved. Although I’ve successfully rallied a squadron on the Jacobite left, the veteran-elite squadron on the right has been wiped out. Fortunately for me, the victorious Williamite horse are pretty much spent. They are much reduced in strength and their brigadier decided he had a pressing engagement elsewhere lol. His men fought on without him.
With supporting fire from the steading, the Williamite artillery and infantry do well in routing the engaged raw Jacobite foot and reducing Lord Louth’s battalion to a quivering mob. I concede!
I still have a backstop of another raw battalion and a gun, all yet to join the fray. Even with these, the cavalry squadron and Purcell’s foot all steady and intact, I’m not going to budge the Williamite forces. They have possession of the field.
An exciting and fun game! Kev picked up the rules well and I did a reasonable job of keeping him right.
It was interesting to get Kev’s views on the rules. He saw aspects of the rules as clunky, citing in particular the modification of the dice multiple ways, so you can change the signature dice, add to the number of dice or modify the score (and potentially reroll). So you have to track multiple things in your head on the fly each time. He expects that it is easy if you play all the time and know the modifiers.
He didn’t feel that the number of tables help to keep the game flowing.
In balance though he ventured that such a granular level may be necessary for a set of rules dedicated to this period. He appreciated why stuff happens and it follows the style of warfare for the period. In summing up, he said that the rules could be more elegant.
We struggled with the maths a bit, but that could be more to do with us than the rules! Lots of fractions work to test our grey matter.
Still on the crest of enthusiasm with BLB, I enter the last game before publishing this blog post. Hopefully you’re bearing with me on this marathon post?!
St Patrick’s Day. I think a BLB game is required! Steve Shann would command the Irish Jacobite forces defending an important road. He has a reasonable brigade of foot comprising Lord Louth’s and Lord Grand Prior’s drilled battalions supported by a raw militia battalion armed only with pikes. To their left is a brigade composed entirely of raw infantrymen. A small calibre artillery piece supports the line.
The Jacobite cavalry is a single brigade of three veteran squadrons. All blade. These have formed on a hill to the right of the foot.
Here come King Billy’s men! The Williamite forces have two strong brigades of foot, each of three battalions. Whilst the French Huguenot brigade are standard drilled foot, the Anglo-Danish brigade is led by the veteran Royal Fuzileers. The Williamite cavalry is all drilled, a mix of blade and bullet and formed in two brigades each of three squadrons. Will double the numbers be enough to defeat the better quality Jacobite horse? In support is a light cannon.
Disparities in troop quality will hopefully give Steve a broad experience of the rules.
The cavalry thunder towards each other. Steve is delighted with the idea of using an “all or nothing” charge with two of his squadrons. Against that my squadron somehow survives the initial impact… to be cut down to a man in the second bound of combat.
Against the single Jacobite squadron of veteran-elite blade cavalry, my boys survive the initial impact… only to rout after the second bound. Darn.
Whilst all of the enemy cavalry are still disordered I press forward with my other squadrons. One squadron refuses to charge and proceeds to retreat!
The other committed squadron struggles manfully, and horsefully, with the enemy…

The infantry close!
I gave Steve the cautionary tale of Roj putting all his foot on defend orders. Steve saw the merits of it, with the enemy in close proximity. And on balance he was right; it slowed his persecution of my cavalry, as his available orders were low, but benefited him in the infantry firefight.

The Huguenot brigade looks resplendent, but seems reluctant to close.

I’m willing to believe that they will close so hold my fire as Lord Louth’s foot open fire at extreme range. The little pop gun next to them causes little harm to anyone.

The English and Danish foot press on as the Jacobites give them a warm - lukewarm for the most part - reception. Steve begins to appreciate that raw troops struggle in a firefight.
The cavalry battle has continued with both sides seeing a squadron cut down to a man. The close combat is bloody.
The Huguenot brigade continues to stand off, but does commence firing. Here the battalion of du Cambon exchanges volleys with Lord Louth’s. Next to them Caillemotte’s battalion are about to deliver a volley which will wipe out the Jacobite gun crew.
Beyond the French, you can see the furious close range firefight between the rest of the Jacobite line and the English of Trelawney’s and the Royal Fuzileers. The first volley from Trelawney’s was so effective, it threw Lord Grand Prior’s men into disorder.
Seeing that the Royal Fuzileers are getting the better of the exchange of musketry, Steve is able to persuade one of the raw pike and shotte battalions to charge! The close combat sways one way then another. We both commit support. The quality of the fusiliers was getting bested by the grit and fervour of the Irish recruits for a while…
Then the Jacobite line burst open as the raw battalions routed in the face of Williamite determination to stand by their colours! It had been a brave attempt. The quality of the Royal Fuzileers proved decisive.
The rest of the Jacobite line stood fast though Lord Grand Prior’s were shaken by the sight of the rout. It would be difficult for them to hold the Williamites back.
The bird’s eye view of the cavalry stand off. Both sides’ cavalry are reduced to about half strength. With the Jacobite foot in trouble, and packing up time approaching, we call it.
An exciting battle! A lot learnt yet again. Steve also enjoyed it and welcomes the next game. He needs to give the rules some thought - being one of us that quickly binned them off several years ago. Like Kev, he found some aspects of the rules “clunky”. He thought close combat was very bloody whereas shooting could go on and on.
He definitely came away with an appreciation of the limited worth of raw troops lol.
I’m thoroughly enjoying my BLB gaming. The narrative quality that’s there makes the rules just as entertaining for solo gaming.
Hopefully entertaining reading for you.
All the best
Chris
WWG in exile