Saturday 11 February 2023

Late 17th Century Wargaming Part 3

A long, long, LONG time ago I was 7 and my best mate’s family took me on holiday with them to Scotland. The highlight was the best spam fritter and chips ever. The lowlight was being washed out of my tent by rainwater in the middle of the night. Somewhere in between I vaguely remember visiting Drummossie Moor and A N Other battle site which meant zero to me at the time. The only thing that stuck in my mind about the second battle site was Soldier’s Leap. As I looked from one side of the stream to the other I couldn’t understand how a person, even if they were a soldier, could leap from the big rock I was standing on to the far bank. With a screaming knot of hairy highlanders chasing you is how to do it!

Fast forward to Wargames World magazine, issue 3 (it was an occasional Wargames Illustrated publication) and an article on the battle of Killiecrankie, 1689. The article, by Graham Cummings, gave a good description of events, a little bit of information on numbers involved and uniforms and was accompanied by a plan of the battle and photos of Wargames Foundry highlanders battling Dixon Miniatures redcoats with pikes and muskets. It was the sort of article that inspires and you return to just to look at the army dispositions and examine the miniatures in the photos.

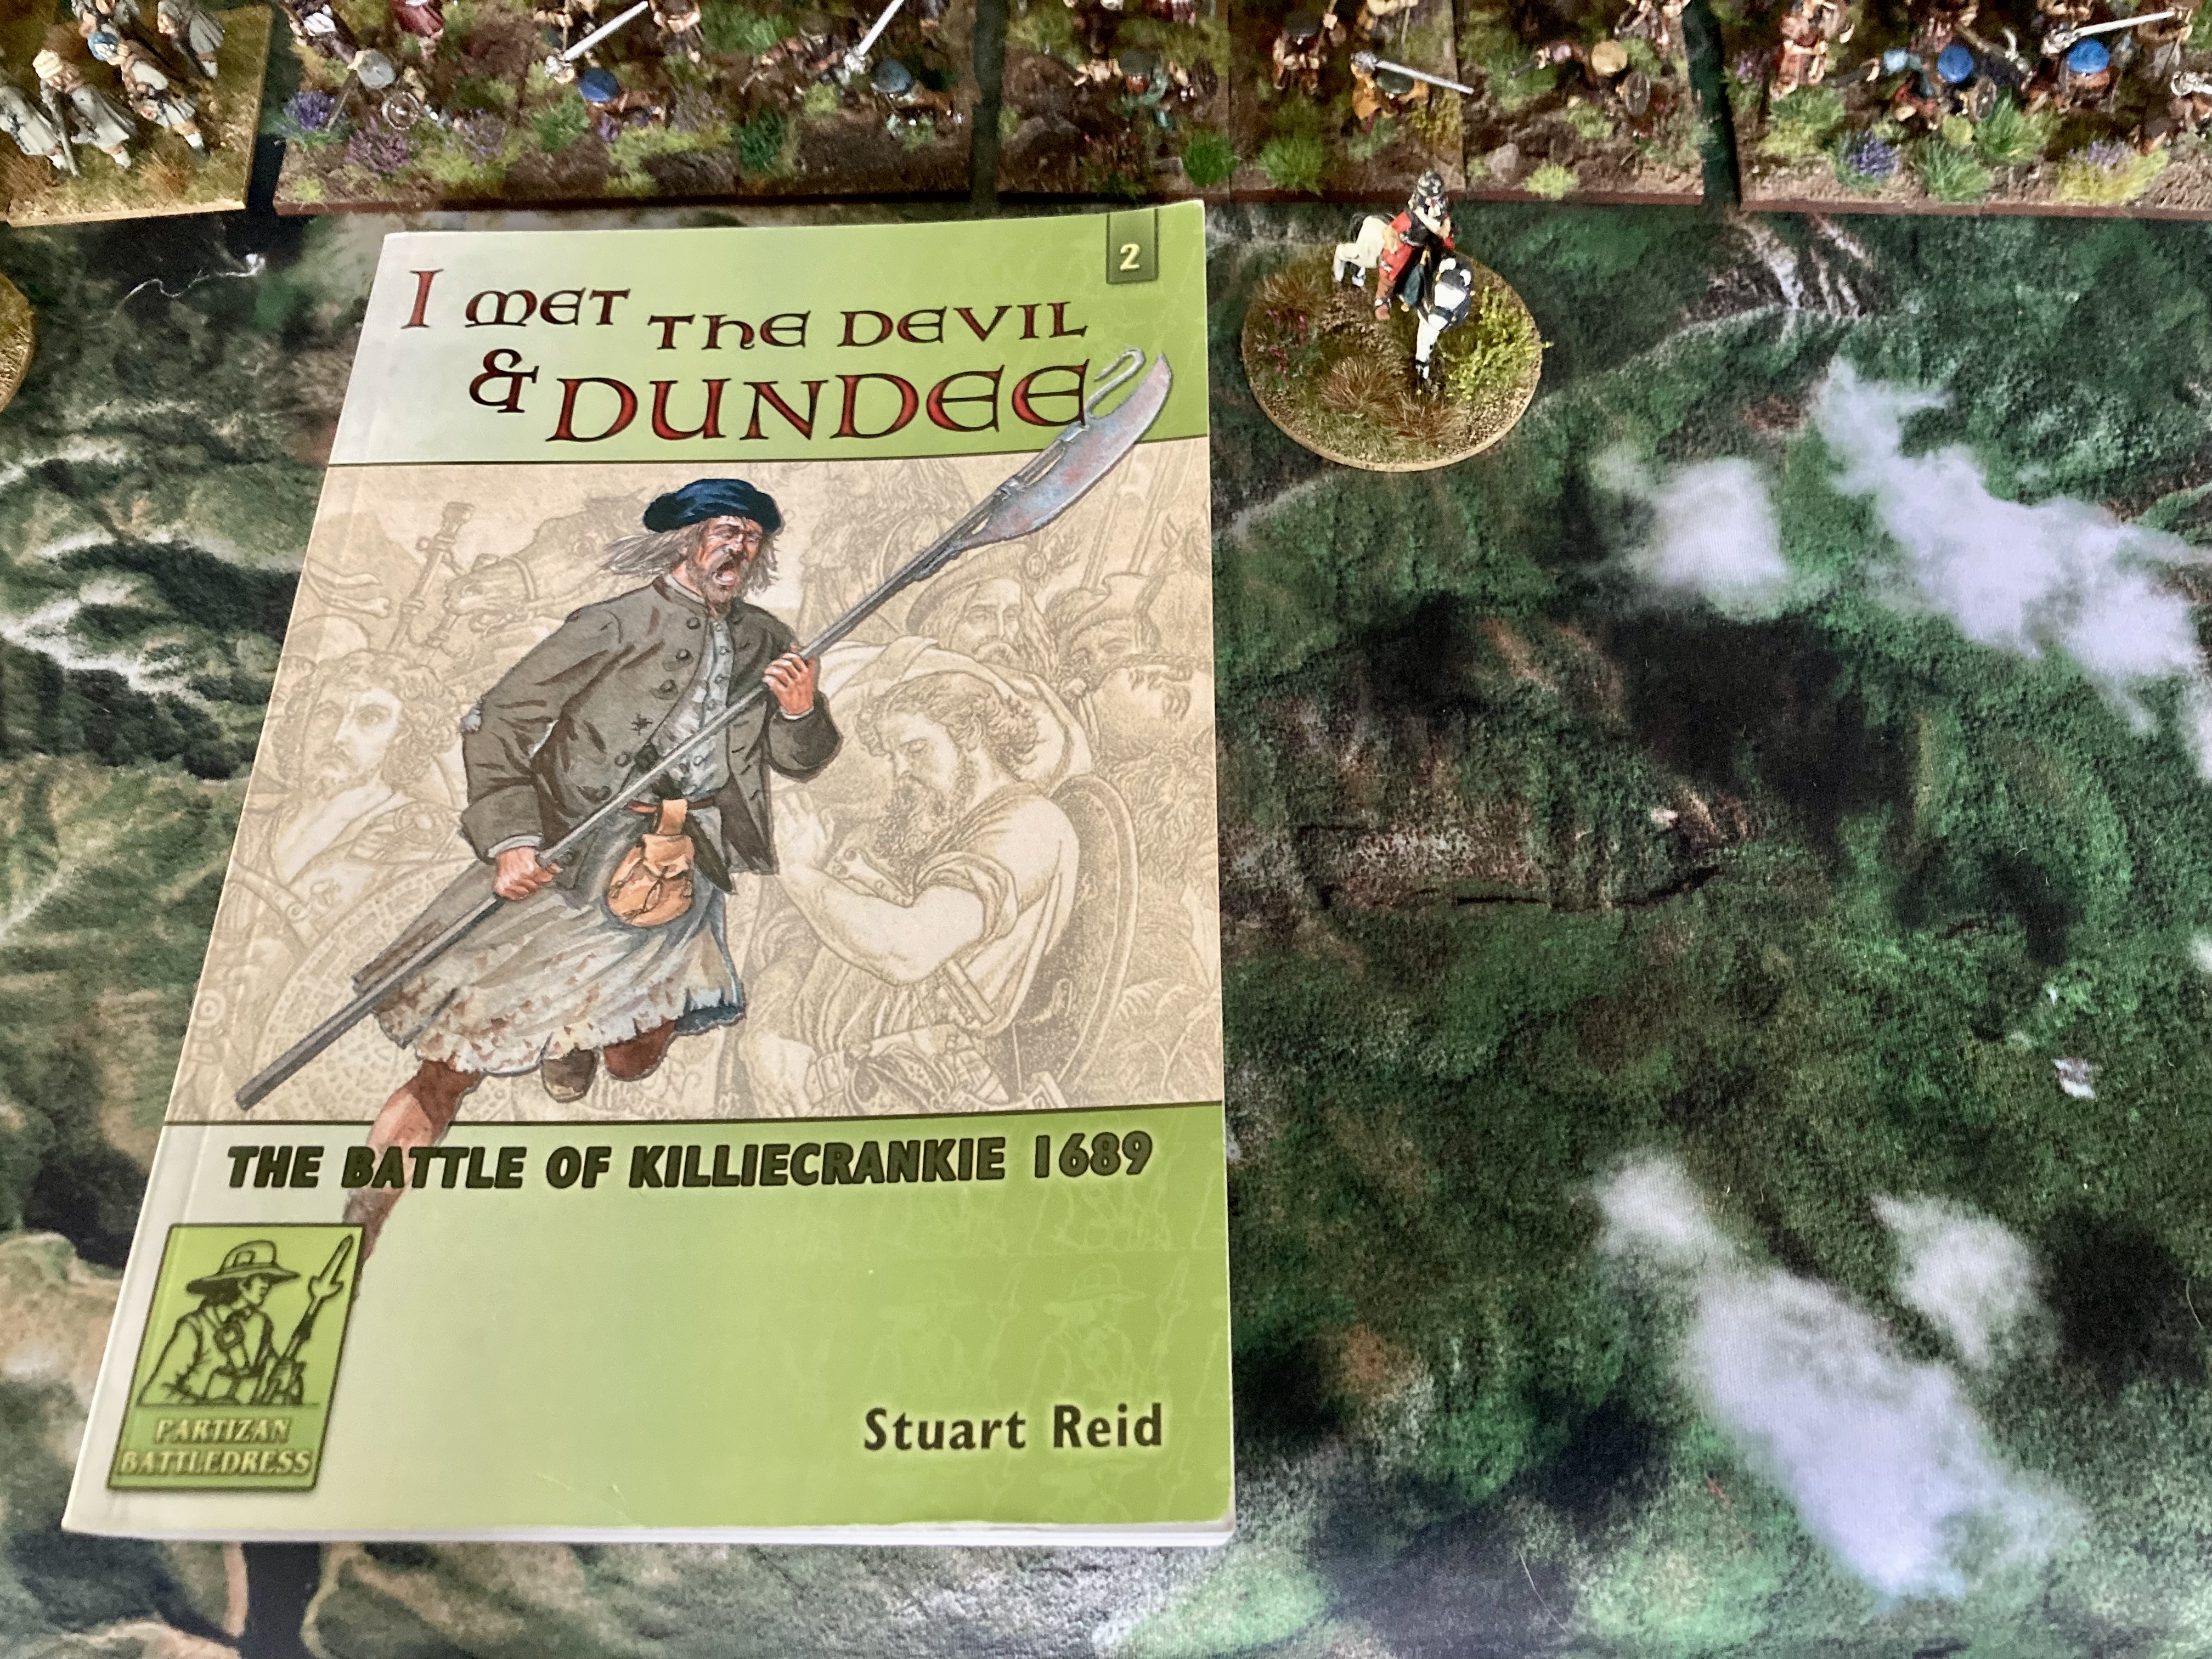
Coming back to the now, having absorbed all the information on the Sedgemoor campaign and set Steve Shann off merrily painting the lovely Front Rank minis,  I hunted for this old article. Then I bought a few books (“I Met The Devil & Dundee” and “Battle of Killiecrankie 1689. The Last Act of the Killing Times”, both by Stuart Reid, are my favourites). Then I looked for suitable figures! 

Now do two small collections make a big collection? I still felt like it was a small collection. The Jacobite army was about 2,000 men and the Scottish government army was about 3,500 strong. I’d not even be doubling my late 17thc collection. It would still be small. I keep telling myself this!

(By way of comparison, Culloden - Drummossie Moor - 16 April 1746, saw something like 14,000 combatants.)

For the bulk of the government army it would be more Front Rank figures as where I need infantry in bonnets, they are there in the range. Easy. For the Jacobites though, especially the highlanders, I didn’t want it to look like a 1745 Jacobite army. So it couldn’t be Front Rank highlanders. Something more primitive was required.

More of that in a mo. First, a summary of this bit in history. 

You’ll not have forgotten King James II from the Sedgemoor campaign. The Duke of Monmouth failed to shift him and messily lost his head (the executioner made a right hash of it). James couldn’t be lenient with him. He needed to come down hard on the rebels and show that he was a strong monarch…

He just wasn’t in a strong position though, especially due to his Catholicism, and three years later his Protestant uncle, William of Orange invaded. With a proper army. And a proper navy for that matter. Surely the British army and navy would send the invading Dutch packing? Nope. King James fled to France and the “Glorious Revolution” was an almost bloodless coup d’état. Hello King William III (who married his cousin Mary, as two half Stuarts equal a whole Stuart).

From France James went to Ireland where the army had been purged of Protestants and a bloody civil war followed lasting nearly three years.


James’s champion in Scotland was Viscount Dundee. Often referred to as ‘Bonnie’ Dundee, I’m guessing he was the epitome of the dashing chevalier. He was an officer of the Royal Regiment of Horse after all.

An army began to form around Dundee and the Scottish government dispatched General Hugh Mackay of Scourie to deal with the Jacobites. Having been informed that Dundee was at Blair Atholl castle (I can recommend a visit there when the laird’s private army is mustered), Mackay advanced to bring the Jacobites to battle. The government army needed to go through the pass of Killiecrankie.

The Jacobite army moved out of Blair Atholl and took post on high ground overlooking the track along which the government army would come. And so it did. The government army deployed and there was a small amount of skirmishing. 

Come 7 o’clock in the evening it was looking like nothing decisive would happen this day. That’s when Dundee unleashed his highland clansmen down the slope.

Mackay faced heavy criticism afterwards for his deployment: his newly raised militia were in the centre whilst the regular troops, including a single English foot regiment, were on the flanks. Although they suffered terribly from the government musketry, the highlanders punched through and the government army folded.

At some point, Dundee had been shot dead. A remarkable Jacobite victory was effectively nullified. The rest of the short campaign went badly for the Jacobites. Two major engagements followed that saw the Jacobite cause in Scotland crushed within a month of Killiecrankie.

The battle of Killiecrankie, 27 July 1689 is one of those occasions that feeds the myth of the highland charge. In this battle it is likely that their momentum down the slope just kept the clansmen coming on despite terrible casualties.

Back to the figures!

For the Jacobite highlanders I chose the dynamic figures produced by Reiver Castings. They are intended for turn of the 18th century clansmen armed mostly with polearms. So ideal for Killiecrankie.

I got someone other than Steve Shann to paint the highlanders…


And they made a shocking job of them! Freaking hideous!!!

As you will see I rescued the situation and the highland regiments are now very presentable.

The Jacobite infantry deployed as per Stuart Reid (they’re the blue army in the illustration). Just without the gaps so I could get them all in shot!

On the extreme left flank are the MacDonalds of Sleat, exact strength unknown. Maybe 500 men. So this regiment is all Reiver Castings and I think they look the part; dynamic and poorly armed! Repainted and based by me.

Where a conventional army had its senior regiments, seniority in highland armies was cycled. Sleat had claimed seniority this day and therefore should have formed the right flank, but due to terrain and lack of experience, the army filed into position from the left.

Next to them stood Sir Alexander Maclean’s regiment. He was a professional soldier and we can expect him to have led a conventionally equipped regiment. His Scottish volunteers were supplemented by Irish regulars. I painted these as Steve has an aversion to tartan! It’s a right mix of Front Rank, Warfare Miniatures and Warlord Games minis. 

In all likelihood, they’ll have made heavy weather of coming down the steep slope at Killiecrankie and may have seen none of the fighting. Conventional infantry moved slowly in the late 17thc and much was made of dressing the ranks. If they reached the government lines        as a body of foot soldiers rather than a rabble, they’ll have arrived too late to make a difference.

Don’t be surprised to see a conventionally armed regiment in a highland army. 40-ish years earlier the Gordon Strathbogie regiment, with pike and musket, turned out for Montrose, King Charles’ champion in Scotland. (Coincidentally both Dundee and Montrose were called James Graham. No relation?)

Then the dispositions show a large gap between the left and the centre. The first regiment in the centre we get to are the Camerons of Lochiel. There were only 240 men in this regiment and they are believed to have suffered 50% casualties! Just goes to show that even the newly raised government regiment under the Earl of Leven could shoot!

(The government army suffered around 20% casualties, which is probably about right for an army quickly beaten at close quarters and pursued. The casualties may well have been higher had the highlanders not turned to looting the baggage train.)

As you can see I’ve gone for a fairly set look to the clan regiments irrespective of the number of men they represent. Each regiment is three deep bases.

Then we find two more MacDonald regiments;


MacDonald of Glengarry, something like 400-600 strong and given the honour of carrying the Royal Standard.

And the MacDonalds of Clanranald. Only about 200 of these chaps. Good turnout of MacDonalds overall though. Well done that clan!

Completing the Jacobite centre was a regiment of Irish foot.

Colonel James Purcell’s regiment! Probably understrength and like Sir Alexander Maclean’s regiment, they couldn’t possibly have kept up with the clansmen coming down the slope without becoming completely disordered. Front Rank minis painted by Steve Shann.

King James sent meagre forces from Ireland to support Dundee. Many were intercepted as soon as they landed, so that it was only this weakened regiment and a couple of understrength companies with Sir Alexander Maclean that provided some regular foot in the Jacobite army. It may even be the case that these regulars were raw recruits themselves. Some folk have Purcell’s as a dragoon regiment (albeit without horses, so at least on foot) and I can understand that, but I’m of the school of thought that says they were infantry. 

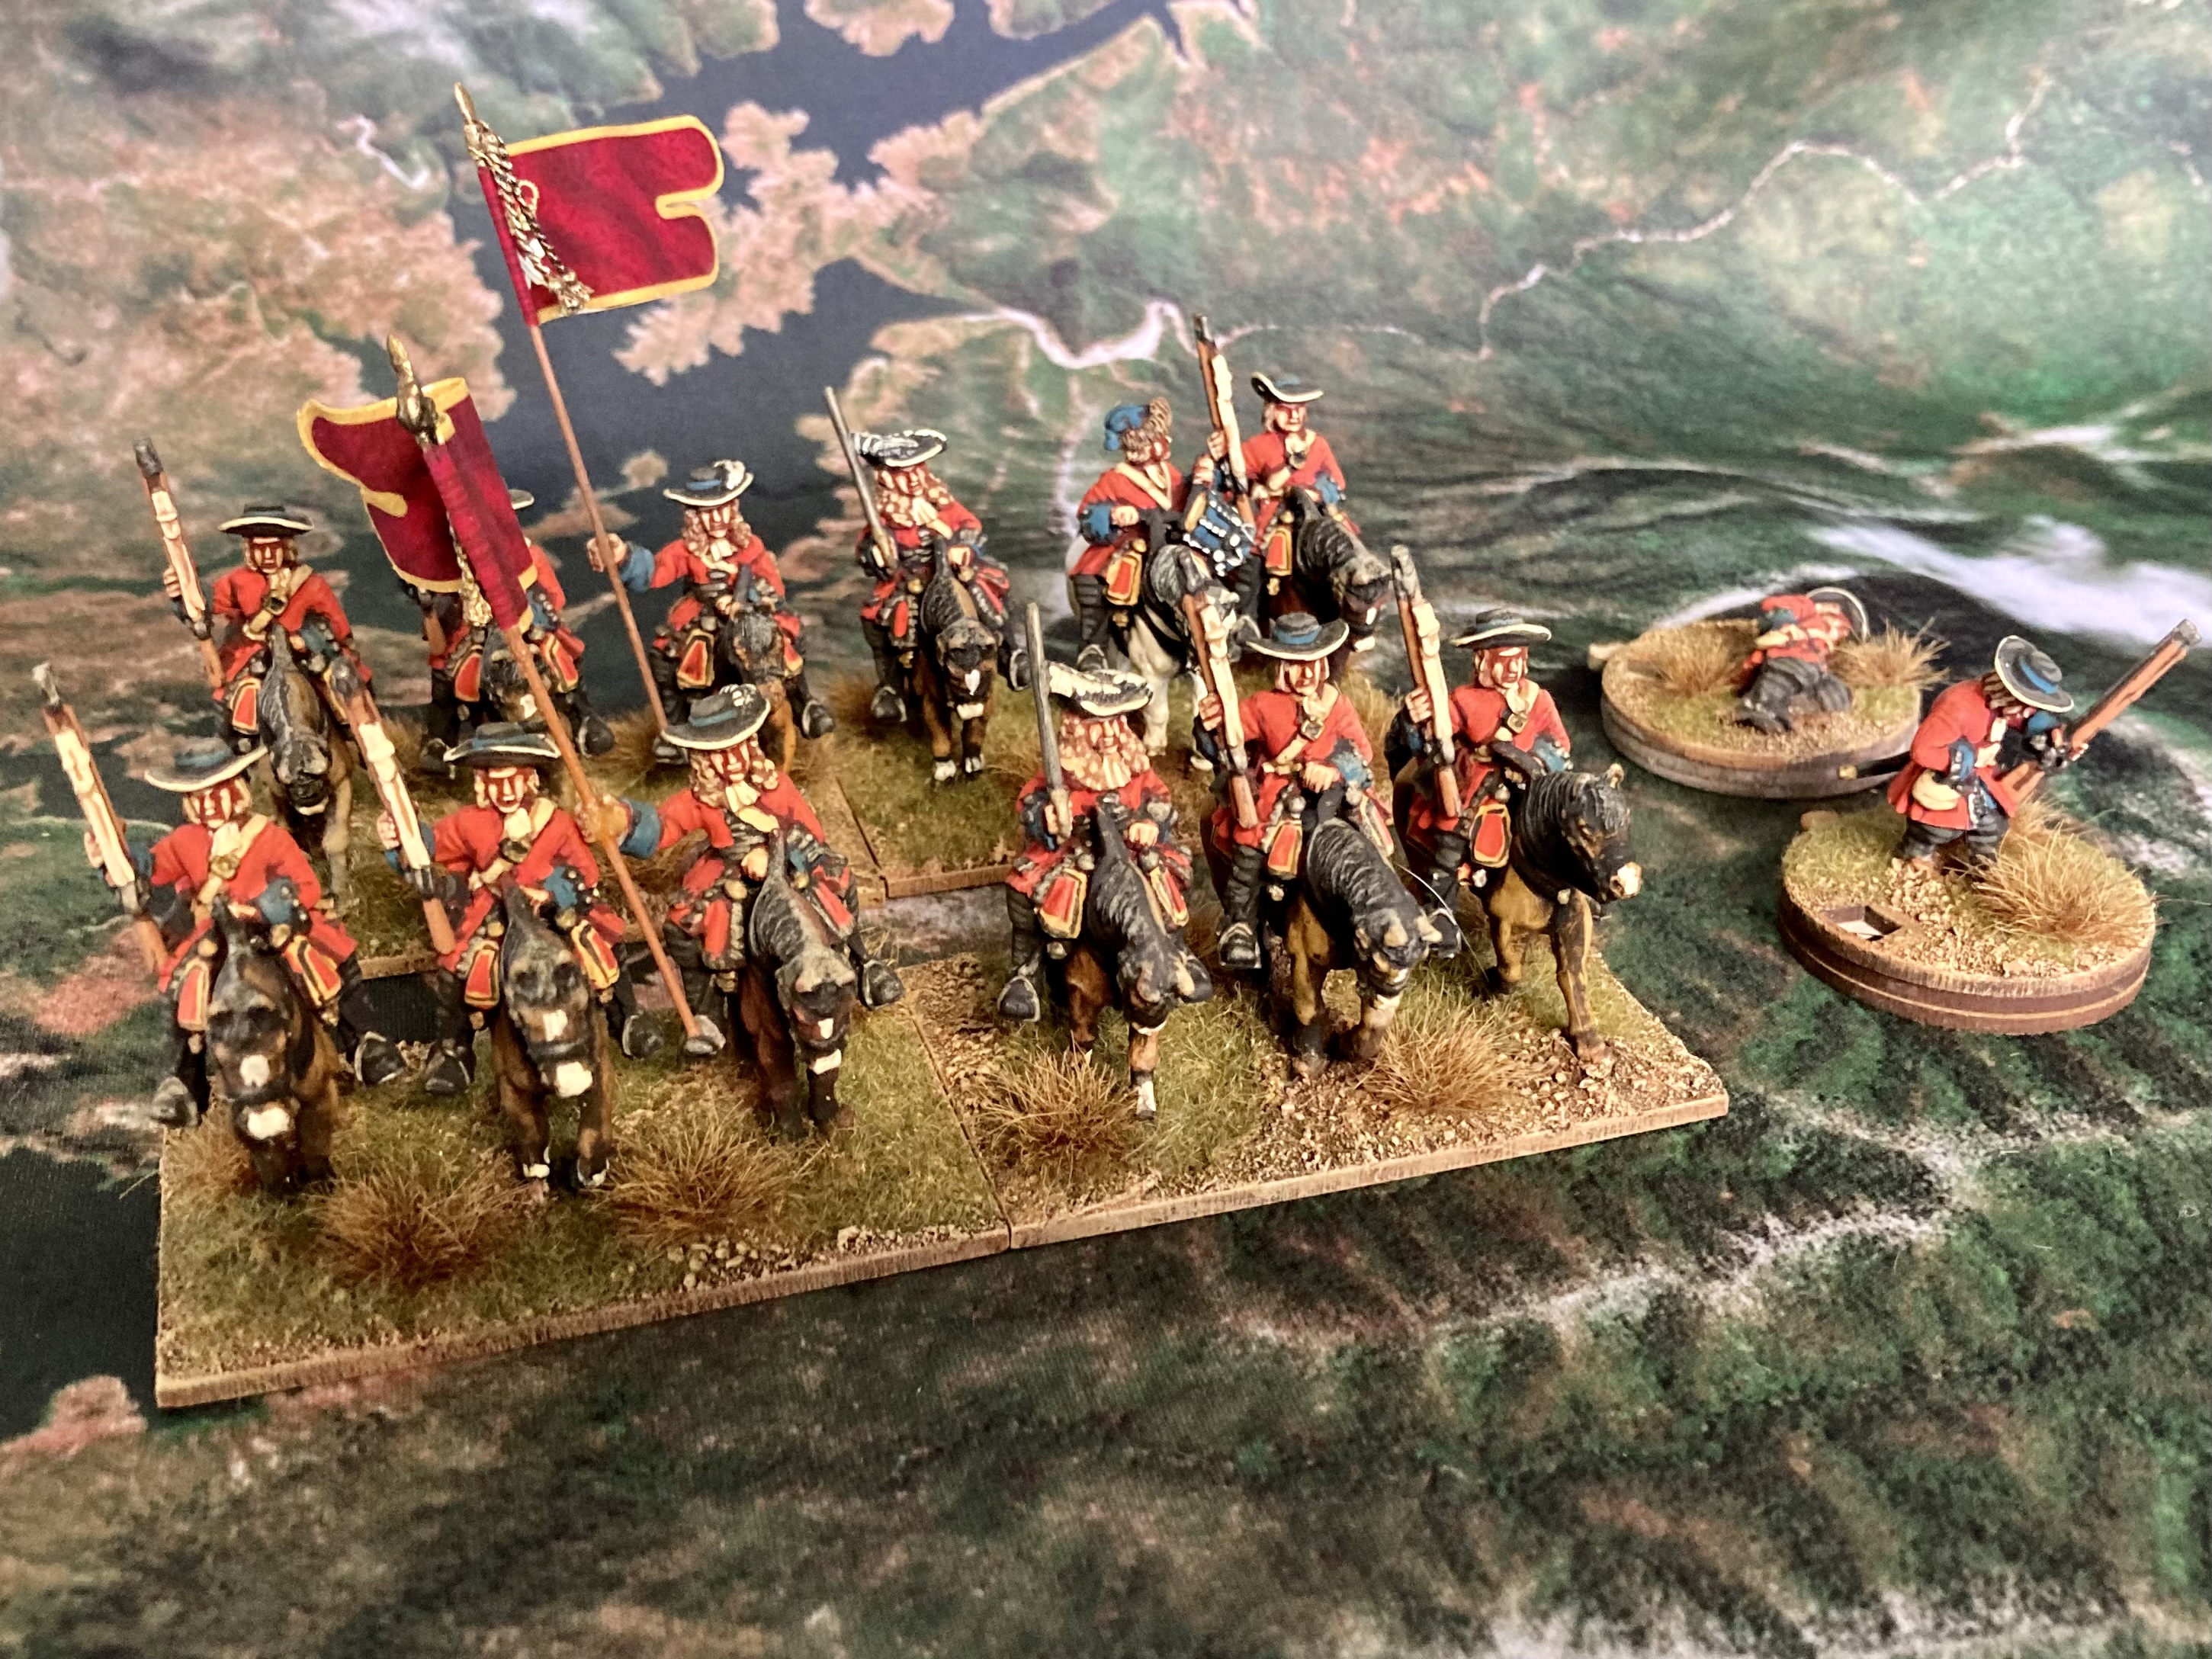
With Dundee, behind the centre, were two small troops of cavalry. I can represent these with a single base of figures from my Sedgemoor collection as a ‘tiny’ unit in Black Powder Pike and Shotte terms.

Big gap again and then we get to the final regiment making up the entire right wing. 

Sir John Maclean’s clan regiment, 200-300 strong. Bof, there were only two full regiments of experienced Scottish regular infantry facing them! Panic gripped the redcoats before the clansmen reached them…!


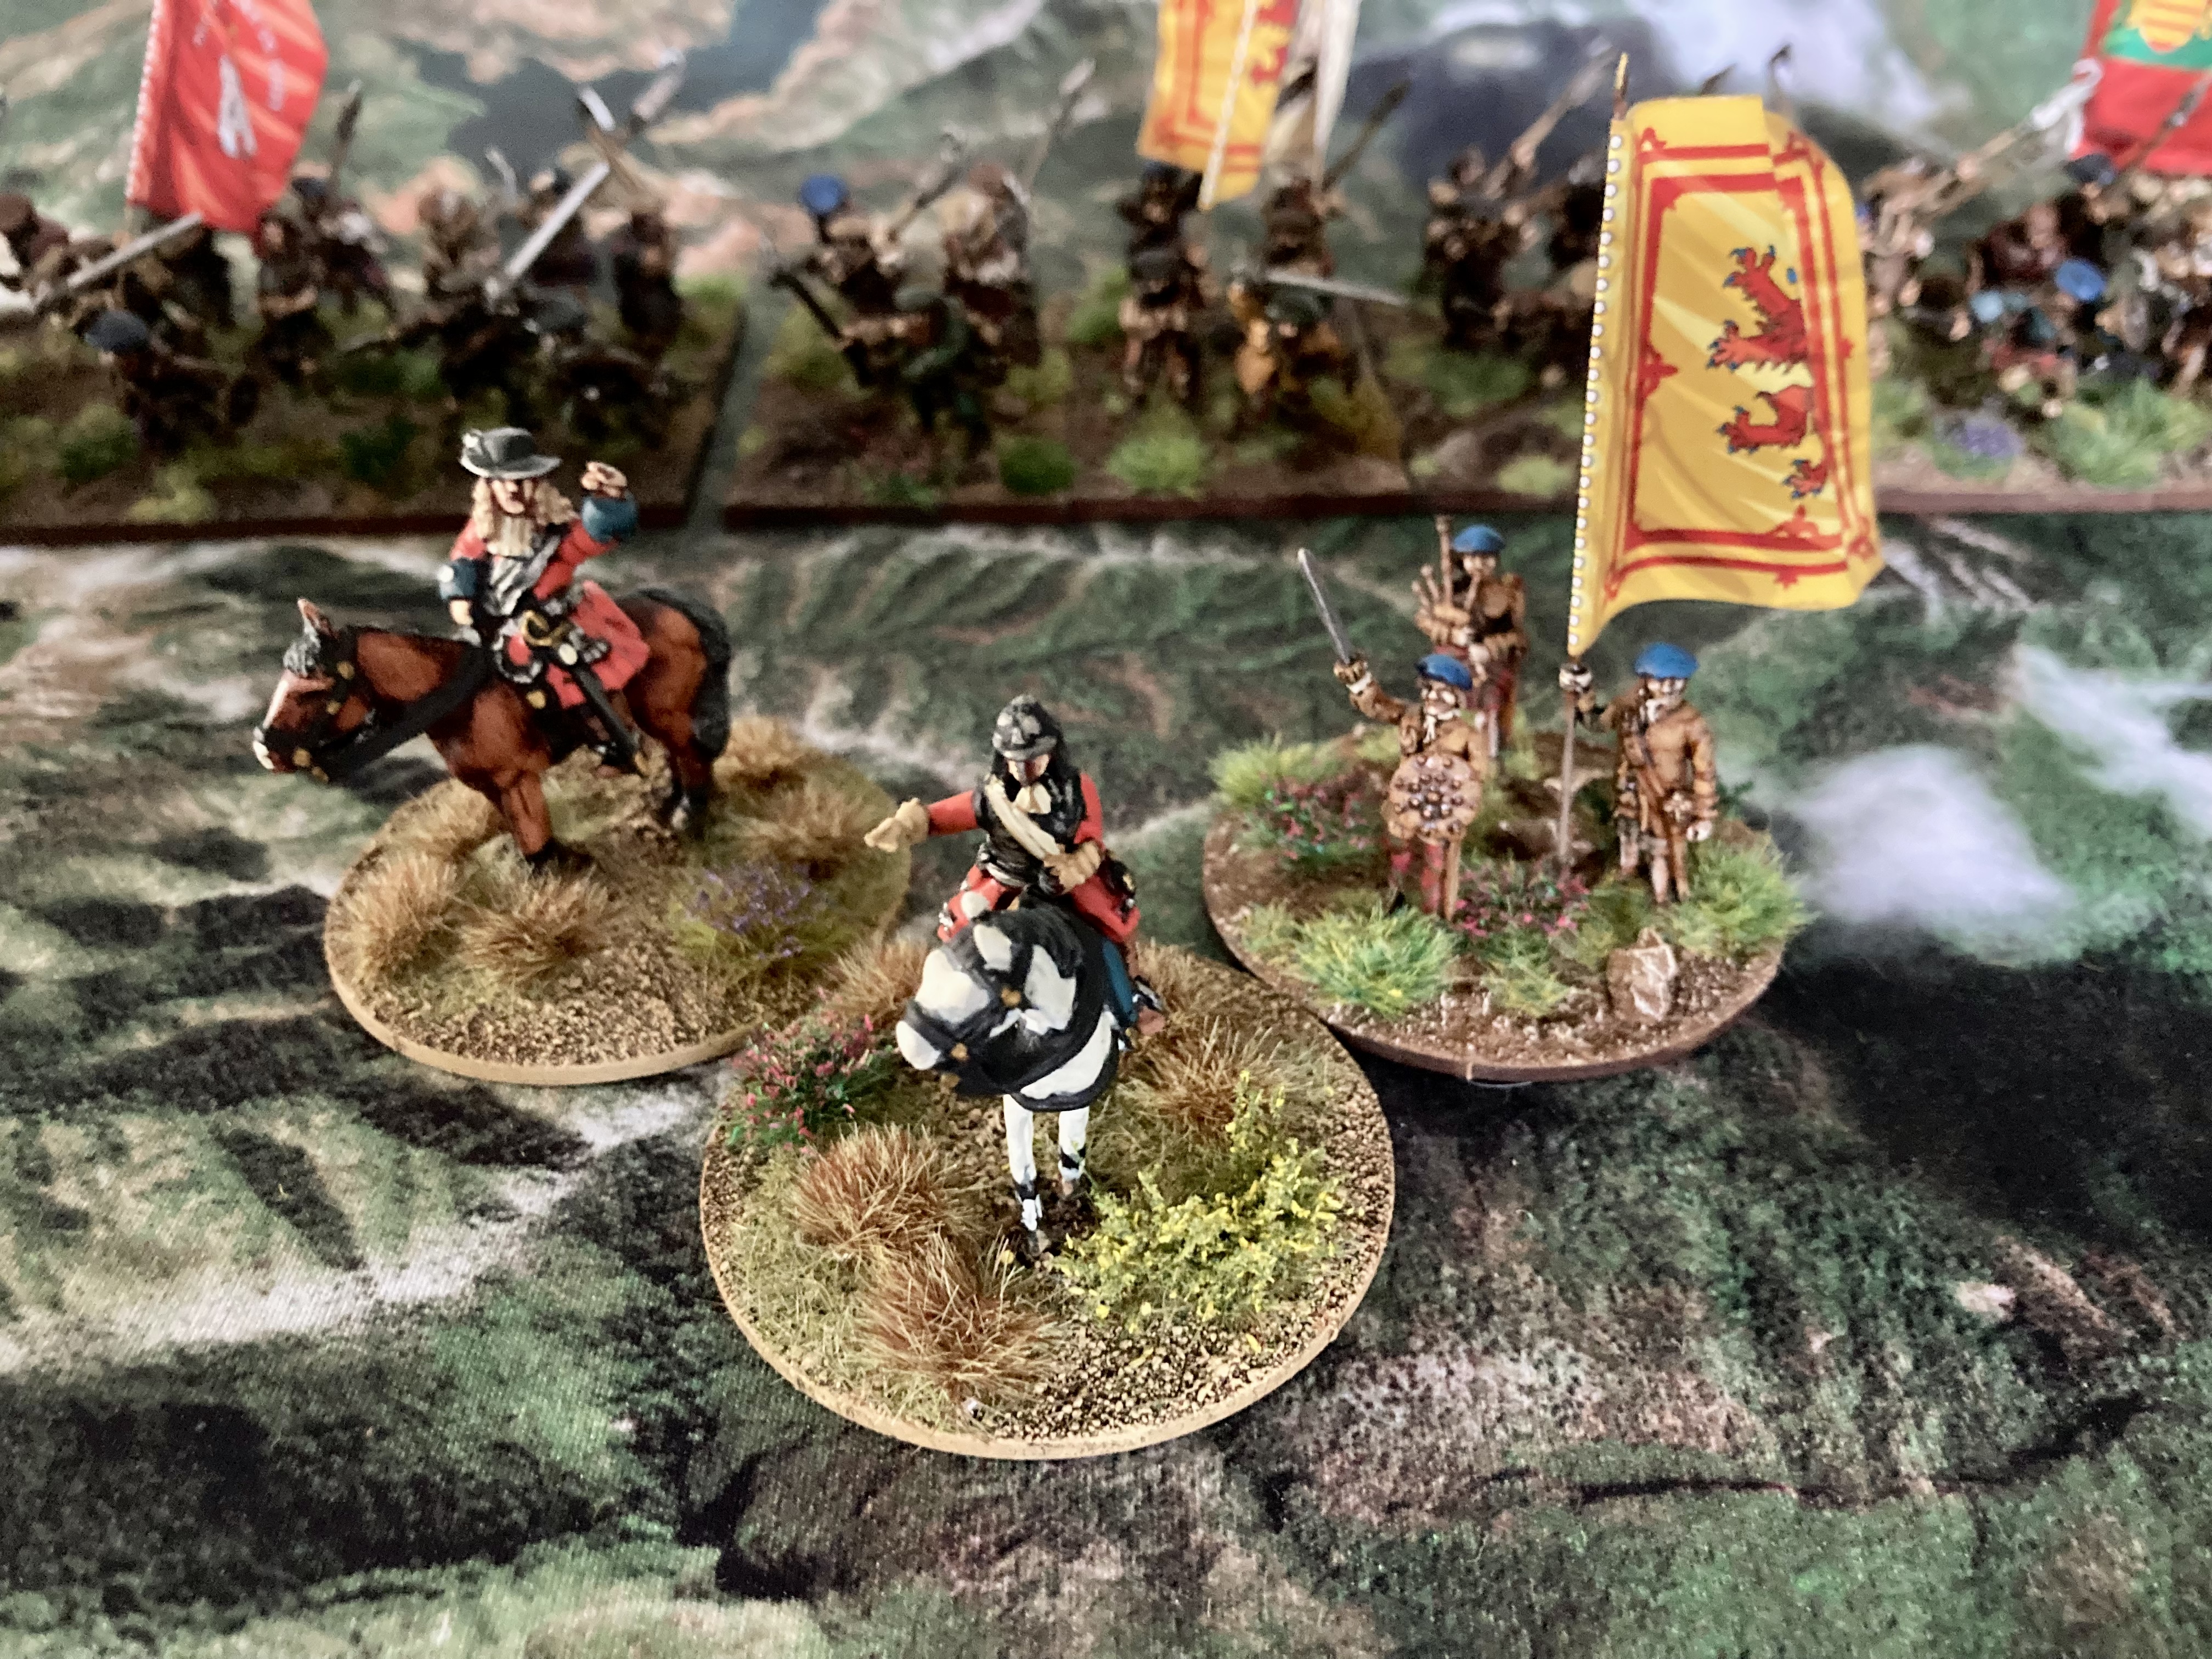
The casualty markers to record any tabletop carnage and the command bases to represent Cannon, Dundee and a clan laird. Reiver Castings for Cannon who took command of the Jacobite army following Dundee’s demise. The other command figures are Warfare Miniatures. I painted the righthand base as a tiny amount of tartan was involved: enough to make Steve shudder.

So there you have my miniatures representing the Jacobite army at Killiecrankie. 

The Atholl regiment joined the army after Killiecrankie. I managed to hold back enough figures from the other regiments to create this one. Mostly cos I had the flag! All of the lovely flags are from Warfare Miniatures by the way.

Thanks for reading. I hope that you continue to enjoy this series of posts. For the next, I’ll pause the history and miniature parades and describe a play test of Black Powder Pike and Shotte.

Cheers

Chris

Monday 6 February 2023

York,and 15mm update.

On Sunday we packed ourselves into Dave's car and set out for Vapnartak show at York racecourse.I didn't take any photographs of the halls and games like I usually do,because many others will do it justice far better than me-the show was of the usual very high standard,traders galore,games galore,and punters galore(it's a pity "pussy" wasn't there,then I could have said PUSSY GALORE!!)-we spent,and spent and spent,figures, terrain,paints,brushes ,you name it and we bought it!!!-food seemed to be the main priority!!


You'd think they'd never been fed for weeks!!-I want no comments about Paul's sausage!!

The inevitable happened,we spent hours trying to avoid him,but like the proverbial "bad penny" he turns up,invites himself onto our table,begs for tea and biscuits-ROBBIE!!!!


It was good to bump into old friends and make new ones-long may it continue!

I bought two items,some stream sections from Kallistra,and three buildings at the Bring and Buy,from our old mate John..................


I am very pleased with the stream sections,and have enough to give a lot of variations,the buildings go very well with the figures, which I am painting at a fair old rate of knots.


Saturday 4 February 2023

Late 17th Century Wargaming Part 2

When the Duke of Monmouth landed in the South West of England and started raising an army to overthrow him, King James threw everything he could against the rebels. It wasn’t actually much. In 1685 the standing army was tiny!

Stephen Carter gives the strength of the Royalist army at Sedgemoor as a maximum of 2,700 foot and 700-800 cavalry. So pretty much the same size as Monmouth’s army. This was one of the things that drew me to recreating Sedgemoor: it only requires small armies.

Let’s review the King’s army!

With regards command, the way it worked was that the most senior officer in the most senior regiment was in charge. The Lifeguards were the senior regiment. The first troop’s colonel was the Duke of Albermarle, so he’d command the army. Nope, as Lord Lieutenant of Devon, he was already busy. So the second troop’s colonel would take command, the Duke of Northumberland. Sorry, busy! Command of the army devolved to the third troop’s colonel, the Earl of Feversham.

Louis Duras, Earl of Feversham was a French nobleman who had fought alongside Monmouth in the 1670s. It was probably fortuitous that command devolved to Feversham as he knew Monmouth’s style.

His critics claim that he slept through the entire battle of Sedgemoor, but that’s unlikely right?  Irrespective, he had been canny in the short campaign, successfully blocking Monmouth from Bristol and London, then pushing the rebels back and he was just about to besiege or assault them in Bridgwater.

I have the above base earmarked to represent Feversham. There are a number of command bases I can use for notables in the Royalist army…


The Lifeguards. Note the combined horse grenadiers base. The horse grenadiers were sent forward at Norton St Philip to rescue the pinned vanguard. Hence I wanted them based together rather than a horse grenadier on each base (each of the three troops contained 50 gentlemen and had 20 horse grenadiers attached). Stephen Carter also has the horse grenadiers as a troop at Sedgemoor.


In addition to the Lifeguards, the Earl of Oxford’s Royal Regiment of Horse fielded 7 troops. Usually just called Oxford’s Blues, this was the only regiment of horse on the establishment! I love that they wore lobster pot helmets. And what a relief that there’s something in the army that isn’t in redcoats!

At Sedgemoor, the cavalry were mostly out on picket duty and deployed in squadrons rather than regiments. They crossed swords with some of Monmouth’s cavalry, but their main involvement was taking the rebel infantry in the flanks and the subsequent pursuit.


Lord Churchill’s Royal Regiment of Dragoons. Yes that Churchill! Later to be Marlborough. If I’ve got it right, 4 troops were deployed in the campaign and 2 of them were present at Sedgemoor. The regiment was fairly new having been formed from the Tangiers Horse after that regiment was disbanded (the evacuation of the Tangiers garrison had been completed just the year before).

As the rebel line initially overlapped the Royalist right, the dragoons dismounted and engaged the rebel Green Regiment. Lord Cornbury, the regiment’s lieutenant colonel, commanded them as Churchill was busy being second in command of the army.

Mounted again, the dragoons pursued the beaten rebels.


The First Regiment of Foot Guards fielded something like 12 companies at Sedgemoor (if Stephen Carter is correct and the 2 grenadier companies were detached), totalling around 1000 men. Unlike Monmouth’s Red Regiment, it was organised as two battalions as depicted here by the two battalia. This feels sensible.


A third battalion of foot guards was fielded from the Second Regiment of Foot Guards: the Coldstream Guards! Again this will have been around 500 strong. We have to imagine that the establishment strength was painstakingly maintained for the companies of Foot Guards.

Alongside them in the two photos above are the Royal Scots. I’m sure that you can tell which one is which. These guys had been out in Tangiers too, but had returned in November 1683.

The three Foot Guards battalions and the Royal Scots formed a brigade under Sir Edward Sackville, a skilled career officer and onetime governor of the Tangiers garrison.

In the Royalist lines, the regiments were camped (and therefore drew up for battle) from right to left: Royal Scots, First Foot Guards and Second Foot Guards.

As Monmouth’s infantry approached from the Royalist right side, it was the Royal Scots who were most heavily engaged whilst the firefight lasted. Older texts put this down to the Royal Scots being armed with matchlocks and the glow of their match, but it’s more understandable that it was due to the direction Monmouth’s army approached from. The poor old Royal Scots even stood steady under fire from Monmouth’s artillery. They were still up to the job when it came to the counterattack!


To the left of Sackville’s brigade was Kirke’s formed from Kirke’s own regiment and Trelawny's. Both regiments may have been understrength which would have made it more a composite battalion than a brigade. And like the Royal Scots both had returned from Tangiers in November 1683. Just reinforces the idea of how small the standing army was. Who knows how differently things would have gone for Monmouth had Tangiers still been held. Half of the regular troops immediately available to King James wouldn’t have been in England!

Even if there was only 5 companies between the two regiments I’ve represented them as normal sized wargames units.

Once Monmouth’s cavalry was neutralised, and with no enemy foot to their front, Kirke’s mini-brigade was shifted over to the right flank where it took part in the counterattack.

Two pieces are enough to represent the Royalist artillery at Sedgemoor. The train of artillery accompanying Feversham’s little army had 18 guns. They had been placed covering the road from Bridgwater and for the most part guns in this era weren’t designed to be moved around during a battle. However 6 light guns were moved to engage the rebel infantry. Hence two model guns is just fine. 

Whilst the regular regiments gathered and converged on the rebel army, it was up to the militia to contain Monmouth. He must be kept well away from London!

I do have a few figures I can use as militia. Initially I only thought to have the Wiltshire militia represented as they were - kept well out of the way! - at Sedgemoor. To represent some of the other battles of the campaign, militia are definitely required. For example, only militia were present fighting Monmouth’s rebels at Bridport and Axminster. 


These figures are the Wiltshire Militia Horse, buff coats with green facings entirely conjectural. I can use them as a lot of other things besides. As the number of cavalry at Sedgemoor is a good deal lower than the norm for this period, it doesn’t hurt to have extra cavalry in the collection.


The Wiltshire Militia Blue and Red Regiments. These are created by adding the command bases, with the flags, to other musketeers and pikemen in my collection. More about that much, much later!

Other than that, I can just press other figures into use as militia. An awful lot is unknown about this period. As there is very little information on the militia uniforms and flags, conjecture rules!

So there you have it. I’ve shown off the armies for both sides for the Sedgemoor campaign. 

It has to be said that I’ve now got a bad case of the late 17thc bug. Before half the figures were painted for the Sedgemoor campaign, my gaze had moved North. I have had a long standing interest in the battle of Killiecrankie in 1689…

Thanks for reading. You won’t be surprised what late 17thc loveliness I’ll have to share with you next time!

Cheers for now

Chris