A while back I noticed Warrior Miniatures were advertising a range of Spatacus/Gladiator figures,so I ordered some,and have just got round to painting them now,see what you think
I quite enjoyed painting these figures and possibly intend to use them when I can manage to get a Spartacan (?) army organised,I'm always amazed at Warrior's range of figures,and his very competitive prices,check them out.
.
Tuesday, 16 October 2012
Monday, 15 October 2012
Big Napoeonic Game 14.10.12.
Last night saw a tremendous Napoleonic game devised by Dave,and involving,18 regiments of infantry ,8 regiments of cavalry and 5 gun batteries per side,all figures provided by Dave and Michael,this was a spectacle that Cecil.B.Demille would have been proud of!!
Brian,Dave and I were the Prussians and Russians,whilst Michael and Paul were the Neapolitans,Wertemburgers,French and Saxons
This first photo shows the Prussians on their ridge,tasked with holding "windmill hill" against the French and allies, until the Russians could get into a position to cut the Allies in half by capturing two vital bridges.
This shows my left flank,Paul is putting me under so much pressure,that if I had been a bunch of grapes I would have turned into a glass of wine!!
I needed the Russians to turn up and divert some of the pressure.
The Russian arrive,however so do the rest of the Saxon/French army.The village in the background saw some serious fighting,and Michael used his Lancers well, to force Brian into square.
This is agood shot of Brian's squares being threatened by Saxon Lancers,the village is being "stormed" by Dave's infantry; he was beaten back the first time but persisted,and the melee went on for quite some time,before the Saxons were victorious.
This photo is of my "grand battery",which I had to form to stop Paul's attacks on my right flank,both side used their artillery to good effect,and caused alot of damage which would have a profound effect when morale was called for later on in the game.
This shot shows Dave's third (?) attack on the village, Michael was forced to send more troops into the "fray" just to stabilise the situation,this tied down vital regiments,so although the Russians eventually lost the melee,they actually did a good job!
This shot is of my left flank,where a wood saw the heaviest fighting,between Paul's Neapolitans and my Prussians,we eventually had a brigade each in the woods,either meleeing or fire-fighting,what a tussle!!
Now here's agood move!! My light cavalry moving forward to force Paul's advancing French columns into square,Paul's gunners must have thought it was their Birthday or something,what a target they presented!! Result inevitable!!!!!
This photo shows Michael's guns opening up on Brian's squares,with devastating results,this was acrucial part of the battle,and two of the squares were forced to give ground,however these are Russians and don't give up too easily!
At this crcial part of the game,I decided to "unleash" my reserve cavalry,and sent them onto Brian's left flank,where the Saxon's were in danger of meeting upwith Paul's troops,I had to stop them merging,and,after a couple of near run melees,just managed to win, and drive the dragoons off the board.This was the end of the game,and we had achieved our objective of capturing the two vital bridges,thus preventing Napoleon from marching onto Berlin.
The title for this photo is......THE VANQUISHED !! actually it's Paul and Michael !!
we all enjoyed this game,roll on Thursday, and roll on Michael's next visit.
Brian,Dave and I were the Prussians and Russians,whilst Michael and Paul were the Neapolitans,Wertemburgers,French and Saxons
This first photo shows the Prussians on their ridge,tasked with holding "windmill hill" against the French and allies, until the Russians could get into a position to cut the Allies in half by capturing two vital bridges.
This shows my left flank,Paul is putting me under so much pressure,that if I had been a bunch of grapes I would have turned into a glass of wine!!
I needed the Russians to turn up and divert some of the pressure.
The Russian arrive,however so do the rest of the Saxon/French army.The village in the background saw some serious fighting,and Michael used his Lancers well, to force Brian into square.
This is agood shot of Brian's squares being threatened by Saxon Lancers,the village is being "stormed" by Dave's infantry; he was beaten back the first time but persisted,and the melee went on for quite some time,before the Saxons were victorious.
This photo is of my "grand battery",which I had to form to stop Paul's attacks on my right flank,both side used their artillery to good effect,and caused alot of damage which would have a profound effect when morale was called for later on in the game.
This shot shows Dave's third (?) attack on the village, Michael was forced to send more troops into the "fray" just to stabilise the situation,this tied down vital regiments,so although the Russians eventually lost the melee,they actually did a good job!
This shot is of my left flank,where a wood saw the heaviest fighting,between Paul's Neapolitans and my Prussians,we eventually had a brigade each in the woods,either meleeing or fire-fighting,what a tussle!!
Now here's agood move!! My light cavalry moving forward to force Paul's advancing French columns into square,Paul's gunners must have thought it was their Birthday or something,what a target they presented!! Result inevitable!!!!!
This photo shows Michael's guns opening up on Brian's squares,with devastating results,this was acrucial part of the battle,and two of the squares were forced to give ground,however these are Russians and don't give up too easily!
At this crcial part of the game,I decided to "unleash" my reserve cavalry,and sent them onto Brian's left flank,where the Saxon's were in danger of meeting upwith Paul's troops,I had to stop them merging,and,after a couple of near run melees,just managed to win, and drive the dragoons off the board.This was the end of the game,and we had achieved our objective of capturing the two vital bridges,thus preventing Napoleon from marching onto Berlin.
The title for this photo is......THE VANQUISHED !! actually it's Paul and Michael !!
we all enjoyed this game,roll on Thursday, and roll on Michael's next visit.
Friday, 12 October 2012
Ancients game 11.10.12. vs Brian and Paul
We had a seriously exciting and interesting game last night,with migrating Gallic tribes trying to cross the Rhone,being opposed by Auxilliary Roman units of Infantry and Cavalry.
Brian and Paul were the Romans and I commanded the Gauls.
The simple scenario is shown above,nothing complicated,even the terrain was simple,it just shows what you can achieve with wargaming if you use your imagination.
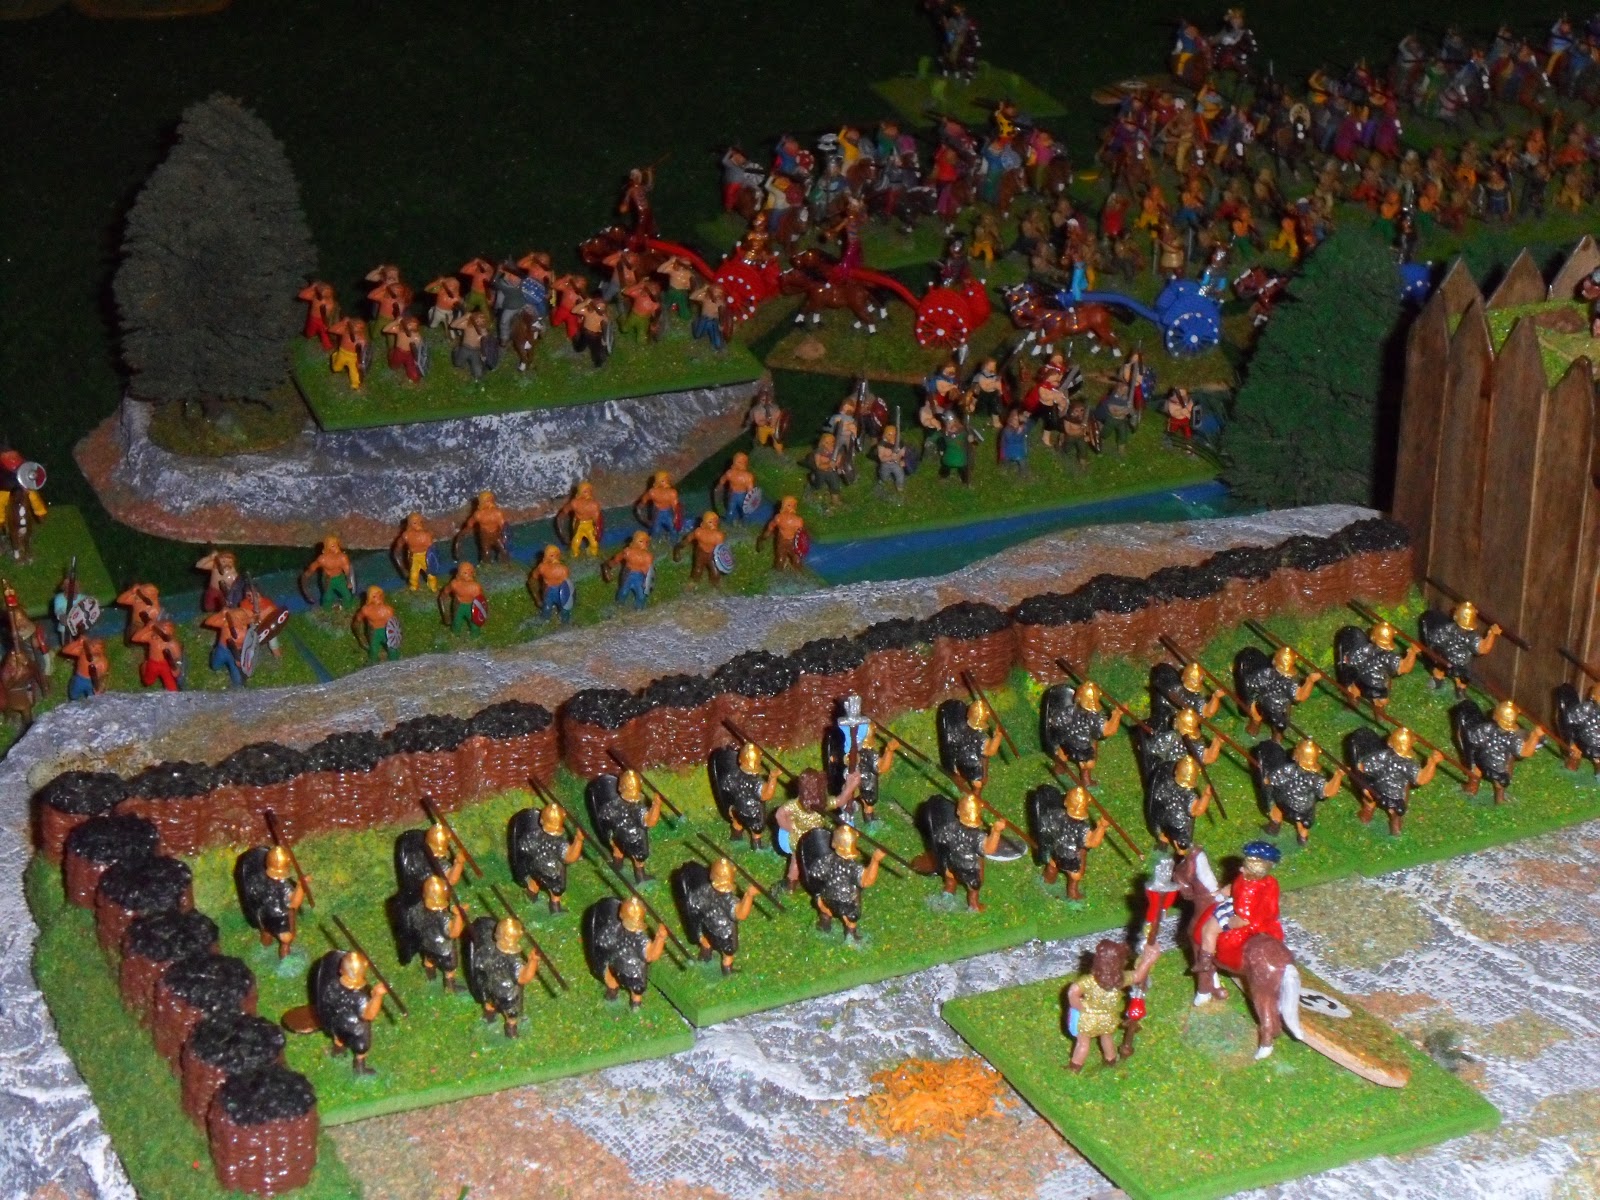
This is the overall view of the board,with my Gauls about to start their attack.My plan was to attack both towers at the same time and also launch a feint chariot attack against the Romans lining the river bank,this was to be a diversion,and they were to swerve away at the last minute and shower the defenders with javelins,prior to the infantry charging in conjunction with the cavalry,don't you just love it when a plan comes together?
This shot shows my chariots (first time on the board-from Warrior) veering away after having hurled javelins at the very surprised Romans,you can also se the infantry poised to charge next move!!
This shows Paul's hill being attacked by slingers as aprelude to the warbands getting stuck in.Both hills held out for a long time,in fact Brian's hill was still in Roman hands at the end of the game.
The shot below is of Brian's hill,which he doggedly defended,even though I continually threw warbands at it.

The photo below shows the tremendous battle at the river's edge,with cavalry and infantry mixed,each side sending more and more troops to try and swing the balance.
I tried to outflank Paul's hill using my light cavalry,this can only be called a big mistake!!,he not only beat them soundly but managed to push them back into my follow-up warband,who had toretire and leave the cavalry to their fate!!
Paul's Romans were not made of the same stuff as Brian's,and fled the hill after a massive assault,as this was one of the game objectives,i.e. get over the river in numbers,I suppose this was really the start of the end for the Romans,however we played on!!
A Roman victory! The Gauls have been pushed back from the river's edge in this shot,however I had cavalry moving up to support and warbands reforming,ready to be sent into the fray again.
The final push,Gallic troops gaining the advantage (good old chariots!) what you can't see out of the picture is the Roman infantry streaming away!!
This final photo shows Brian's hill,still intact at the end of the game,how I don't know!!
On Sunday our mate Michael is coming down from Aberdeen,and bringing some of his figures,pitting them against Dave's figures,so we are all expecting a good game.Roll on Sunday.
Brian and Paul were the Romans and I commanded the Gauls.
The simple scenario is shown above,nothing complicated,even the terrain was simple,it just shows what you can achieve with wargaming if you use your imagination.
This is the overall view of the board,with my Gauls about to start their attack.My plan was to attack both towers at the same time and also launch a feint chariot attack against the Romans lining the river bank,this was to be a diversion,and they were to swerve away at the last minute and shower the defenders with javelins,prior to the infantry charging in conjunction with the cavalry,don't you just love it when a plan comes together?
This shot shows my chariots (first time on the board-from Warrior) veering away after having hurled javelins at the very surprised Romans,you can also se the infantry poised to charge next move!!
This shows Paul's hill being attacked by slingers as aprelude to the warbands getting stuck in.Both hills held out for a long time,in fact Brian's hill was still in Roman hands at the end of the game.
The shot below is of Brian's hill,which he doggedly defended,even though I continually threw warbands at it.
The photo below shows the tremendous battle at the river's edge,with cavalry and infantry mixed,each side sending more and more troops to try and swing the balance.
I tried to outflank Paul's hill using my light cavalry,this can only be called a big mistake!!,he not only beat them soundly but managed to push them back into my follow-up warband,who had toretire and leave the cavalry to their fate!!
Paul's Romans were not made of the same stuff as Brian's,and fled the hill after a massive assault,as this was one of the game objectives,i.e. get over the river in numbers,I suppose this was really the start of the end for the Romans,however we played on!!
A Roman victory! The Gauls have been pushed back from the river's edge in this shot,however I had cavalry moving up to support and warbands reforming,ready to be sent into the fray again.
The final push,Gallic troops gaining the advantage (good old chariots!) what you can't see out of the picture is the Roman infantry streaming away!!
This final photo shows Brian's hill,still intact at the end of the game,how I don't know!!
On Sunday our mate Michael is coming down from Aberdeen,and bringing some of his figures,pitting them against Dave's figures,so we are all expecting a good game.Roll on Sunday.
Monday, 8 October 2012
English Civil War.7.10.12.
We had an E.C.W. game last night,involving a storming of a Royalist defence works,and the intercepting of a "powder" waggon due for the defences.
Brian and I were the Royalists and Paul was the attacking Parliamentarians,I was not coming onto the board until move number 4 with a relieving force-too late was the cry!!
Brian was outnumbered by two to one initially,and managed to hold out for a long while against Paul's ferocious attacks by cavalry and infantry.
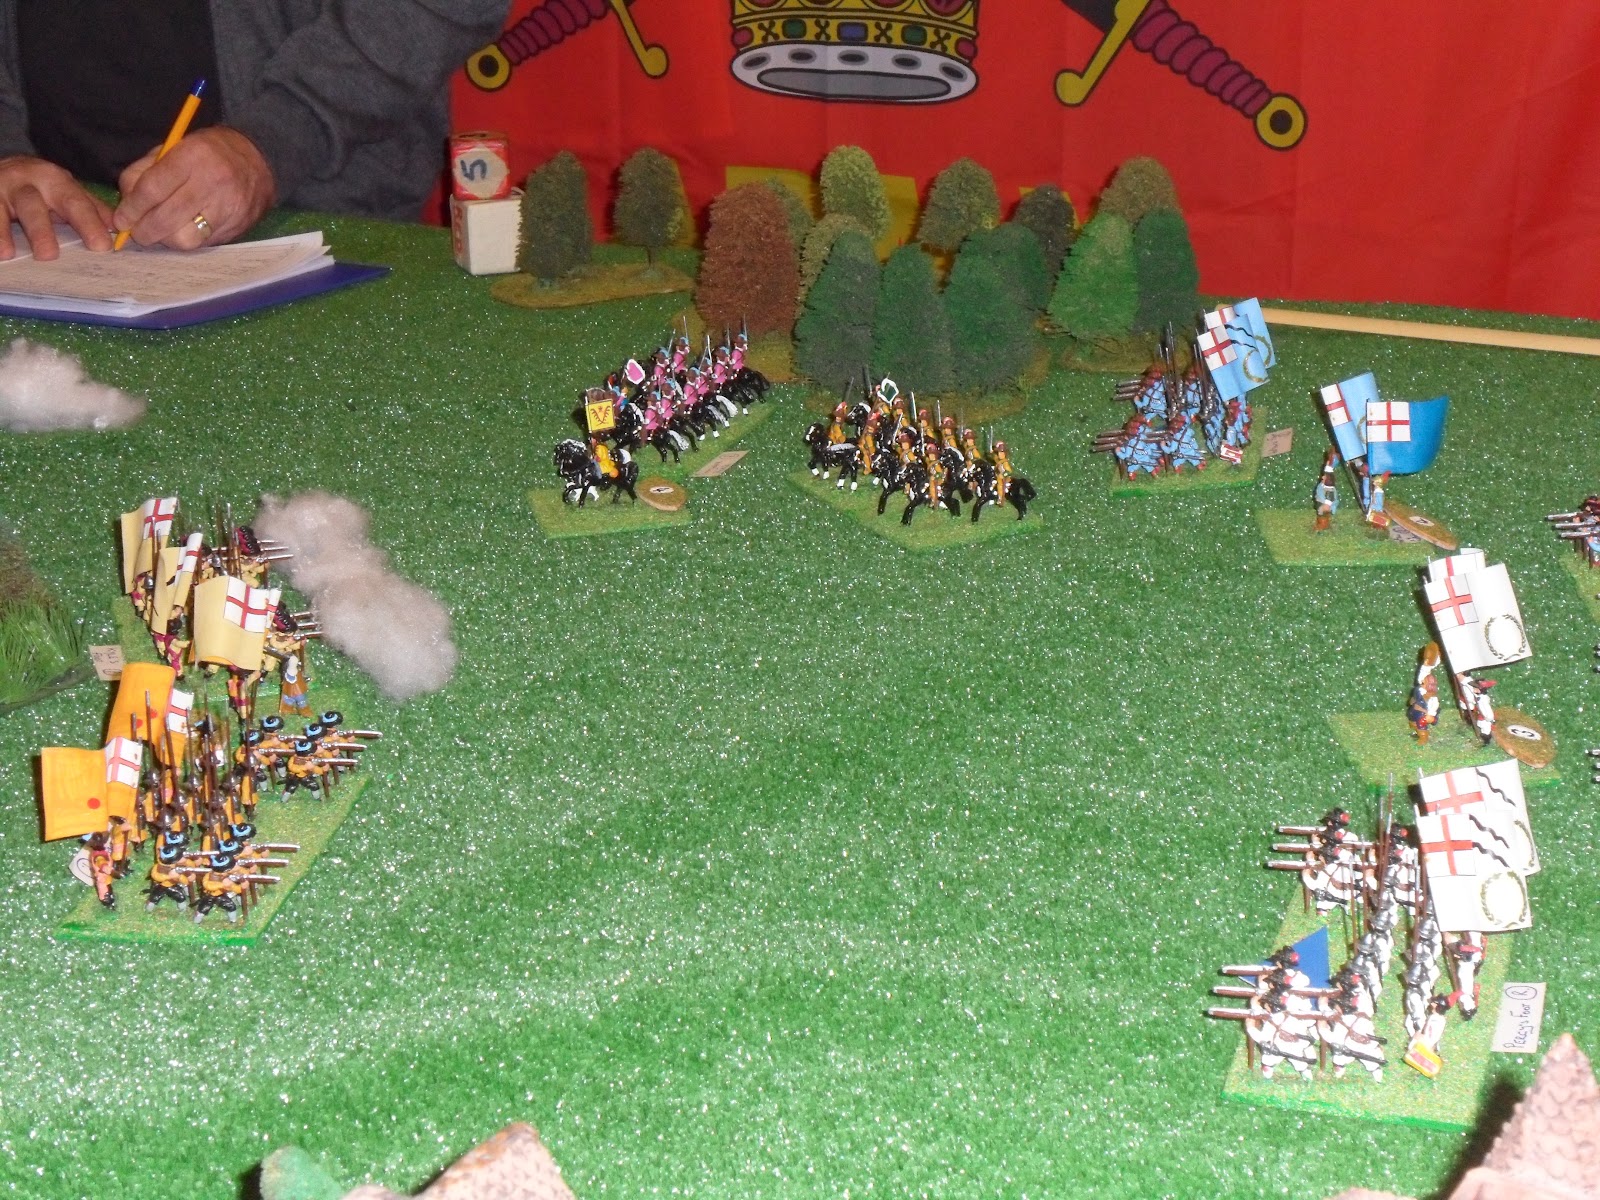
The first photo shows the first of many cavalry clashes,Paul had sent all of his cavalry to outflank and prevent the powder waggon fron getting to the defences,however Brian was quick to spot the move and sent his elite Rupert's Horse to counter this.An "impassable" marsh was not Impassable and you can see Paul's commanded musketeers splashing their way through it,these troops did alot of damage to Brian's cavalry,and eventually upset his whole flank!!
The above shot is of Paul's infantry attack against the defences,this is such a colouful period,I don't know why we don't play it more often.Brians inf. shot the attackers but couldn't stop them getting into melee.
Hurrah John has arrived with the reief force,but has along way to go to catch up with the action!!
The photo below shows Paul's cavalry being beaten in melee and being forced back into his infantry,now that's a thing we rarely see!!

This is the parliamentarians being "ejected" from the defences,after a long melee,in which they managed to get into the defences and inflict some very unkind damage the defenders.
This was Paul's "finest hour",his outflanking move to the left of the defences took both Brian and I by complete surprise,Brian did manage to get one unit to fire on them,but weight of numbers etc.etc.
This shot shows the fire-fight at the defences form the Parliamentarian side of the table,Paul put in such an intense attack,it was really only a matter of time before Brian's forces crumbled,and I was still too far away to help!!
Oh dear, Brian's Lifeguards are being "chased" through the defences by Paul's cavalry,and look the powder waggon has finally made it ! This was the beginning of the end,with his defences breached (purple unit) and his cavalry in disarray,and his relief force "fannying about " somewhere on the board, the Royalist cause was lost.
This final photo has been put in just to show that I did actually get engaged with the Parliamentarians!!
This was another good game, and although Brian felt he was under "the cosh" most of the game,he bravely managed to hold on for a lot longer than I thought he would.
Roll on Thursday.
Brian and I were the Royalists and Paul was the attacking Parliamentarians,I was not coming onto the board until move number 4 with a relieving force-too late was the cry!!
Brian was outnumbered by two to one initially,and managed to hold out for a long while against Paul's ferocious attacks by cavalry and infantry.
The first photo shows the first of many cavalry clashes,Paul had sent all of his cavalry to outflank and prevent the powder waggon fron getting to the defences,however Brian was quick to spot the move and sent his elite Rupert's Horse to counter this.An "impassable" marsh was not Impassable and you can see Paul's commanded musketeers splashing their way through it,these troops did alot of damage to Brian's cavalry,and eventually upset his whole flank!!
The above shot is of Paul's infantry attack against the defences,this is such a colouful period,I don't know why we don't play it more often.Brians inf. shot the attackers but couldn't stop them getting into melee.
Hurrah John has arrived with the reief force,but has along way to go to catch up with the action!!
The photo below shows Paul's cavalry being beaten in melee and being forced back into his infantry,now that's a thing we rarely see!!
This was Paul's "finest hour",his outflanking move to the left of the defences took both Brian and I by complete surprise,Brian did manage to get one unit to fire on them,but weight of numbers etc.etc.
This shot shows the fire-fight at the defences form the Parliamentarian side of the table,Paul put in such an intense attack,it was really only a matter of time before Brian's forces crumbled,and I was still too far away to help!!
Oh dear, Brian's Lifeguards are being "chased" through the defences by Paul's cavalry,and look the powder waggon has finally made it ! This was the beginning of the end,with his defences breached (purple unit) and his cavalry in disarray,and his relief force "fannying about " somewhere on the board, the Royalist cause was lost.
This final photo has been put in just to show that I did actually get engaged with the Parliamentarians!!
This was another good game, and although Brian felt he was under "the cosh" most of the game,he bravely managed to hold on for a lot longer than I thought he would.
Roll on Thursday.
Friday, 5 October 2012
Greeks vs Persians,4.10.12. vs Paul
Paul and I played a "gripping" ancients game last night,using the same terrain as the afternoon game with Brian,only the Greeks were on the hills and the Persians were attcking them.Paul had his Spartans on his right flank,with his centre covered by a multitude of Hoplites,supported by light inf. and skirmish troops,his left was held by heavy cavalry.
On my side of the board,my left consisted of Mercenary Hoplites and Immortals,with a couple of units of archers,meanwhile my centre was made up of "poor" axemen,and good spearmen,supported by skirmish troops,my right flank was made up of heavy cavalry.
The above photo shows the overall view ,with the Persians on the right, and the Greeks on the left,Spartans on the end of the table,facing mercenaries and Immortals.
This shows the Persian centre,axemen and spearmen,I advanced the axemen as quickly as possible and took on the opposing Hoplites,I was,of course,mauled badly!! however I inflicted casualties on the Hoplites which counted against them when I put my spearmen into the "fray" later on.
This is my left flank,Mercenary Hoplites and Immortals,I extended my line and hit the advancing Spartans in the flank,and after a tremendous struggle,eventually surrounded the Spartans and anhialated them!!
This is Paul's centre,Hoplites and light troops,cavalry reserve in background, he used these well and supported his left flank with them to outnumber me,this had mixed fortunes,as I won one cavalry battle and he won the other,and so it remained until the end of the game.
Look at those imposing Spartans! Paul decided to bring them off their hill and attack me whilst I was advancing,the ensuing melees lasted until the last move,and swung both ways,with some terrible dice throws from both of us,combined with some good throws,this was the stuff of real wargames!!
This shot shows my Axemen being severely "mauled" by Paul's Hoplites in the centre,but note the advancing Spearmen,who took on his Hoplites and after a struggle both side could make no headway,so that eventually led Paul to ask for a draw,which I was happy to accept.
This is the "titanic" struggle for the Persian left flank,with the Spartans clashing with my Mercenary Hoplites,and the Immortals moving onto the flanks.
Spartans about to be surrounded,the ignomy of it! With your shield or on it!!
This shows the Cavalry battle on the right flank of the Persians,this was agood "tussle" and Paul handled his forces well,managing to support both of his units with his reserve unit,it has to be said with mixed results,but very effective.
This is the battle in the centre which raged on until the end of the game,Paul's heavier Hoplites gave me a good "drubbing" but somehow I managed to hold on to most of my Spear units,although Paul did have the advantage at the end.
Bye,bye Spartans,surrounded at last,with no escape Paul capitulated on this flank,but gave me a bloody nose on the other flank,so a draw was a fair result.
This is the final shot,Paul's Hoplites pushing my Spearmen back,with my reserve cavalry just holding some troops on the flank,although I knew I couldn't hold them much longer.
Roll on the next game.
On my side of the board,my left consisted of Mercenary Hoplites and Immortals,with a couple of units of archers,meanwhile my centre was made up of "poor" axemen,and good spearmen,supported by skirmish troops,my right flank was made up of heavy cavalry.
The above photo shows the overall view ,with the Persians on the right, and the Greeks on the left,Spartans on the end of the table,facing mercenaries and Immortals.
This shows the Persian centre,axemen and spearmen,I advanced the axemen as quickly as possible and took on the opposing Hoplites,I was,of course,mauled badly!! however I inflicted casualties on the Hoplites which counted against them when I put my spearmen into the "fray" later on.
This is my left flank,Mercenary Hoplites and Immortals,I extended my line and hit the advancing Spartans in the flank,and after a tremendous struggle,eventually surrounded the Spartans and anhialated them!!
This is Paul's centre,Hoplites and light troops,cavalry reserve in background, he used these well and supported his left flank with them to outnumber me,this had mixed fortunes,as I won one cavalry battle and he won the other,and so it remained until the end of the game.
Look at those imposing Spartans! Paul decided to bring them off their hill and attack me whilst I was advancing,the ensuing melees lasted until the last move,and swung both ways,with some terrible dice throws from both of us,combined with some good throws,this was the stuff of real wargames!!
This shot shows my Axemen being severely "mauled" by Paul's Hoplites in the centre,but note the advancing Spearmen,who took on his Hoplites and after a struggle both side could make no headway,so that eventually led Paul to ask for a draw,which I was happy to accept.
This is the "titanic" struggle for the Persian left flank,with the Spartans clashing with my Mercenary Hoplites,and the Immortals moving onto the flanks.
Spartans about to be surrounded,the ignomy of it! With your shield or on it!!
This shows the Cavalry battle on the right flank of the Persians,this was agood "tussle" and Paul handled his forces well,managing to support both of his units with his reserve unit,it has to be said with mixed results,but very effective.
This is the battle in the centre which raged on until the end of the game,Paul's heavier Hoplites gave me a good "drubbing" but somehow I managed to hold on to most of my Spear units,although Paul did have the advantage at the end.
Bye,bye Spartans,surrounded at last,with no escape Paul capitulated on this flank,but gave me a bloody nose on the other flank,so a draw was a fair result.
This is the final shot,Paul's Hoplites pushing my Spearmen back,with my reserve cavalry just holding some troops on the flank,although I knew I couldn't hold them much longer.
Roll on the next game.
Subscribe to:
Posts (Atom)