

I roped Steve and Chris F into a small action of the 1685 Sedgemoor campaign that interests me greatly; the fight at Norton St Philip, 27th June 1685, “Bloody Lane”.
Lazy, but check out Carter’s summary here:
https://warwalks.com/2020/06/27/battle-of-norton-st-philip/
It’s largely been his writings that I’ve followed in putting my Sedgemoor collection together. I like his style and take on events.
The game focused on the initial developments and fighting with the objective being to hold/take the barricade across the road from Bath.


Carter’s nice map on which our recreation was based and Grafton’s troops approaching down the Bath road. Chris F took command of the Monmouth forces and Steve the government troops.

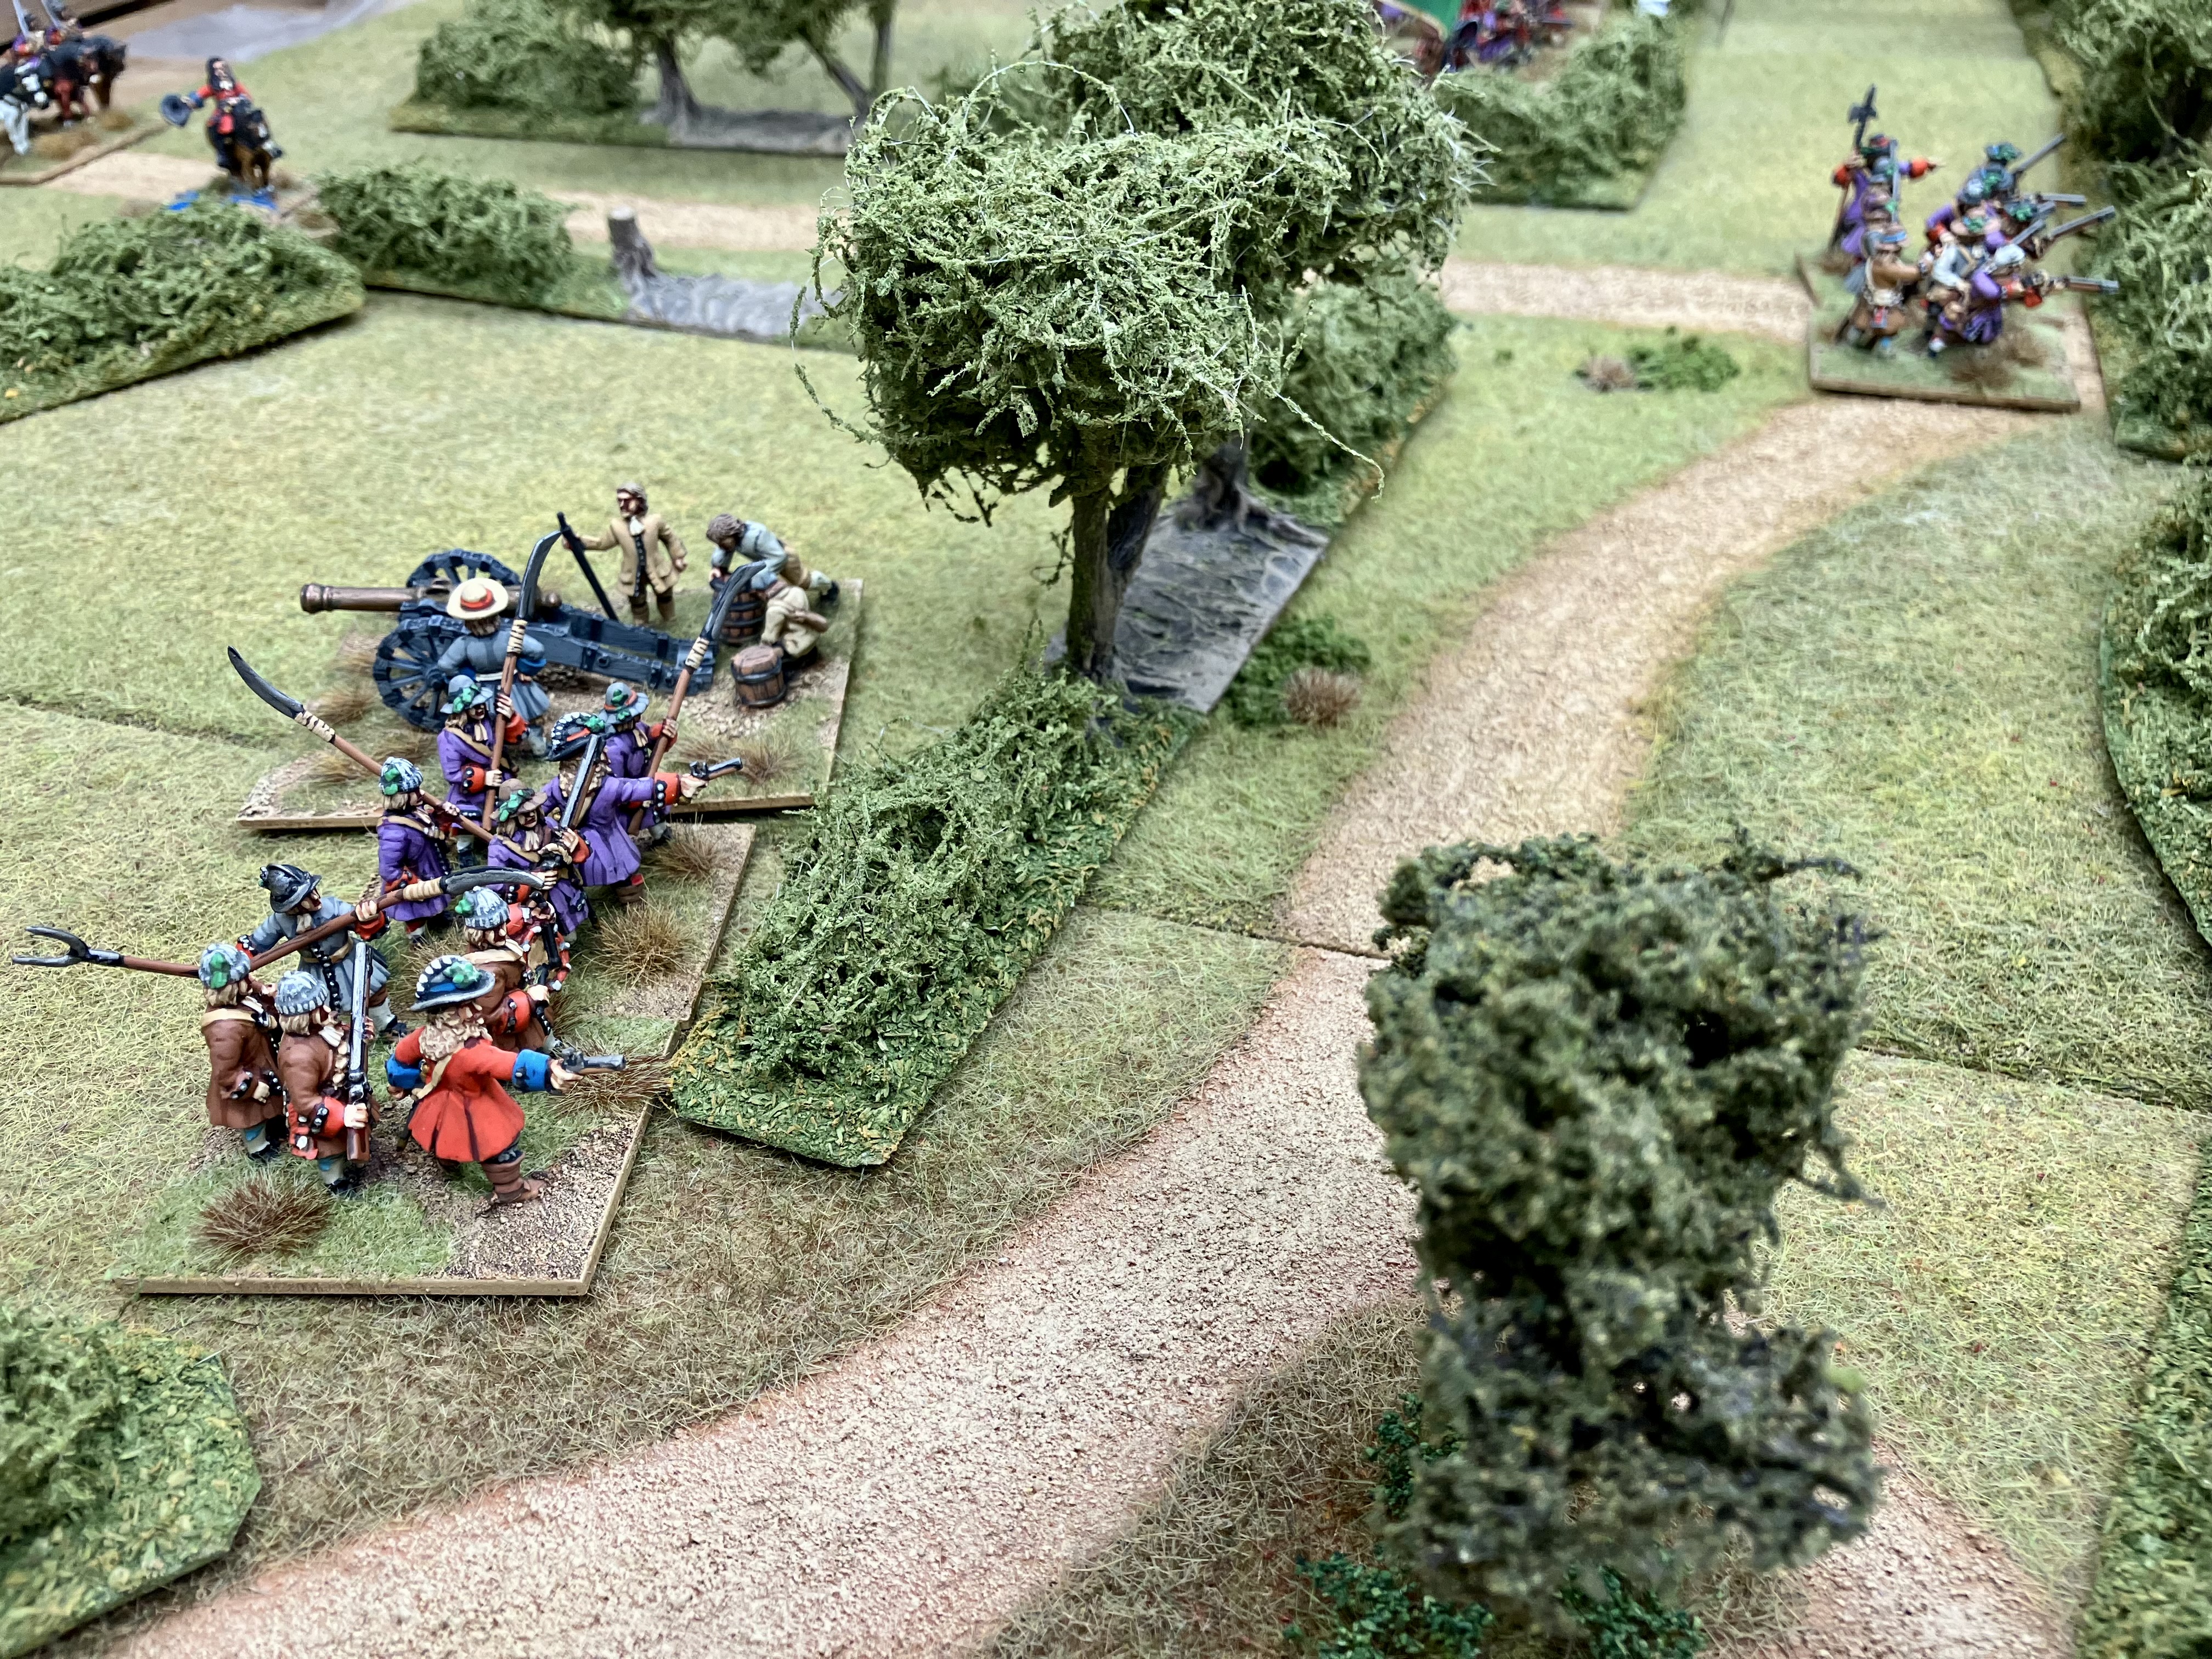
Vincent’s company of Wade’s regiment man the barricade.


Monmouth oversees the rearguard rushing to support Vincent's company.

The grenadiers open fire on the enemy manning the barricade. It proves ineffectual at this range. We may have to learn to hold our fire to take better advantage of First Fire in the Pike and Shotte rules (an extra die).

The rebels are coming!

Pretty soon that light artillery piece is going to be in a position to fire. In the background, Wade has moved the rest of the “Red” regiment (in purple coats) to the left flank of the barricade boys.

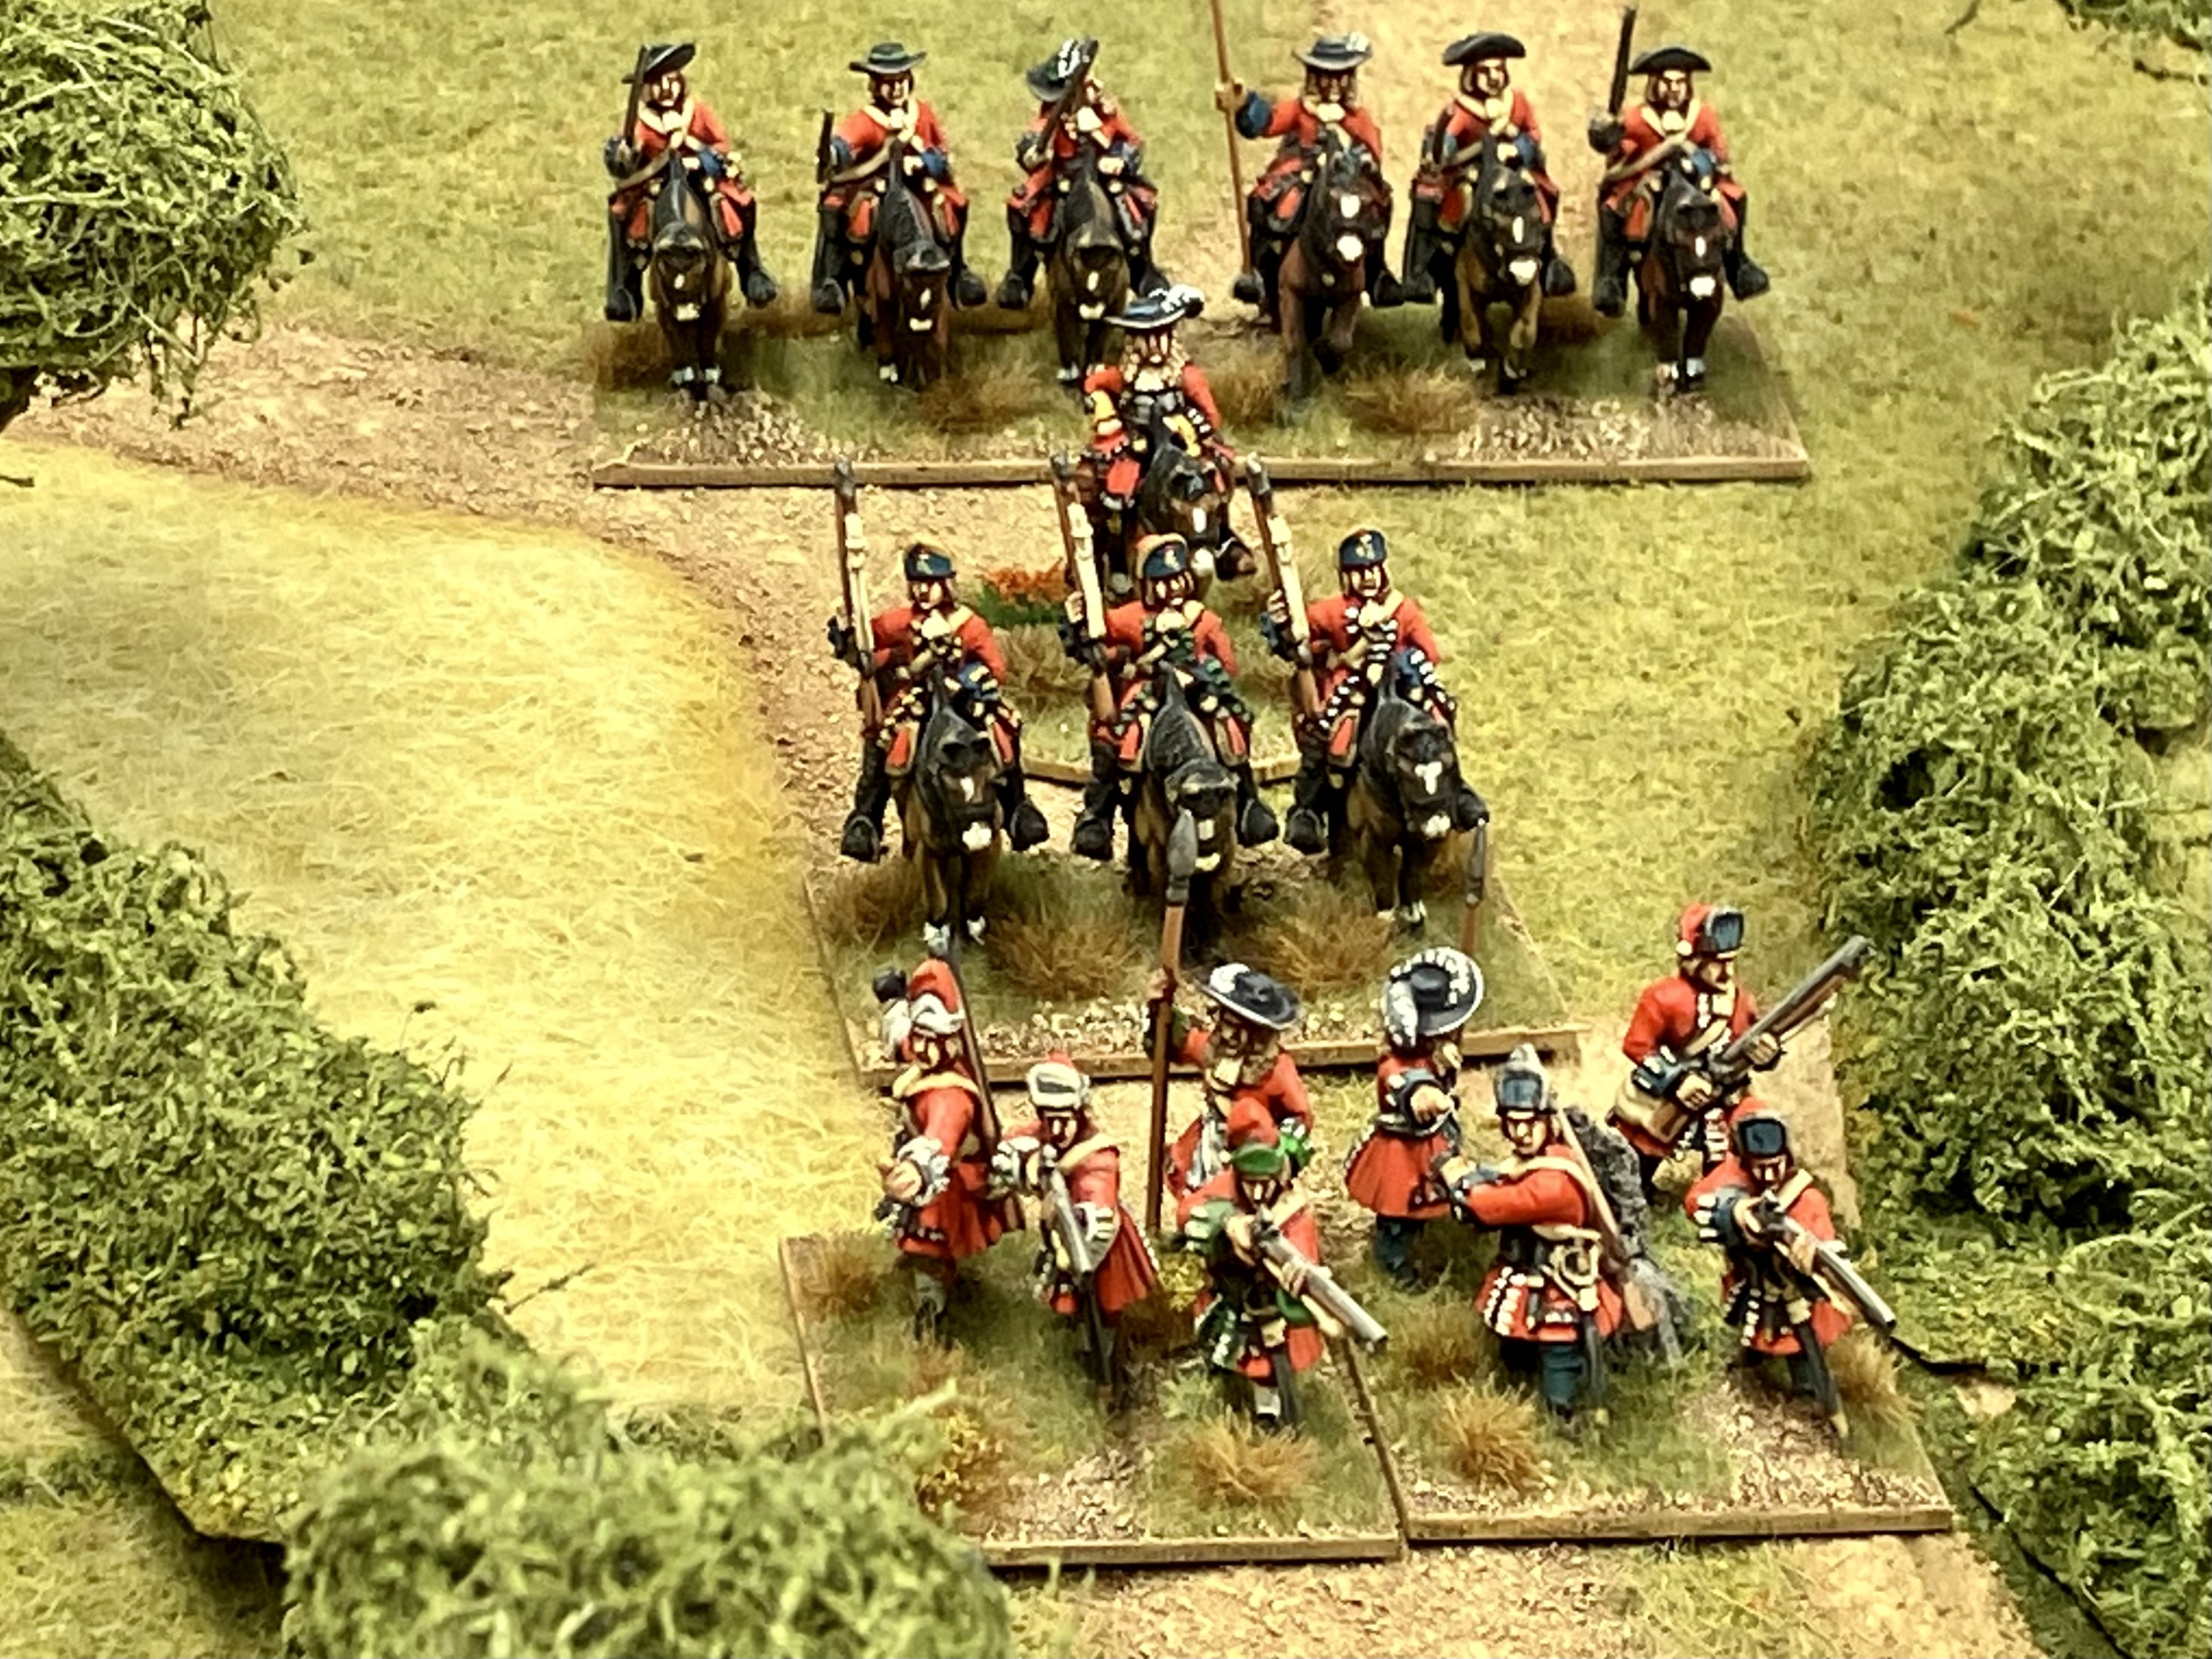
Churchill, yes he of Blenheim fame, has moved all the mounted government troops off the road on one flank only (possibly avoiding the rebel artillery - I should have asked Steve!), whilst Kirke’s infantry move along the road to support the grenadiers.


The grenadiers charge Vincent’s company with Kirke moving to support. This is the sort of job expected of grenadiers… They’re held off!

The mounted government troops are coming under long range fire from Wade’s regiment. It’s a Blunder that has forced the horse grenadiers to withdraw though!


The grenadiers are taking casualties and have lost the fight against the rebels! How rude. They’re raw recruits after all. The grenadiers withdraw to regroup behind Kirke’s men.


Maybe Kirke’s can carry the barricade? However there’s a lot of rebels directing fire at them and though casualties are light, it’s keeping Kirke’s men disordered. In rules terms, they’re prevented from charging.


Steve tries to turn the rebel flank! The Royalist horse charge the rebel volunteer horse. We decide that the hedge negates the charge bonus. The resulting melee was a handbags at ten paces affair!
We had previously poo-pooed the use of Supports in Pike and Shotte, but the second squadron of rebel horse in support causes the regular cavalrymen to lose and they have to take a Break Test. Steve rolls poorly and they rout off table!


The barricade is held by rebels with more rebels in support and in good positions on both flanks…
The grenadiers have moved to alleviate some of the pressure on Kirke’s, but the situation has become untenable.

A small, but resounding victory for Chris F / Monmouth!
An interesting little game which I’ll definitely try again. Maybe starting the rebel troops (other than Vincent’s company of course) further away from the barricade. Then the government troops will have a better chance of taking the barricade and then the rebels would need to re-take it.
Special thanks to Steve and Chris F for humouring me. And as ever, thank you for reading!
Cheers
Chris
No comments:
Post a Comment