Between the major Jacobite events of the 1680’s-90’s and the ‘45 were a smattering of smaller Jacobite rebellions. The 1719 Jacobite rebellion was one of these smaller set tos. It was a once ‘n’ done affair; a failed invasion of England (by the Spanish) and unenthusiastic clansmen in Scotland meant certain doom for the little Jacobite army that took up defensive positions in Glenshiel.
Our tabletop recreation set up with Jacobites on the left and government army partially visible on the right. The Jacobites are defending! Not something you see everyday.
An article in Wargames Illustrated persuaded me that the battle of Glenshiel could be worthy of tabletop recreation. After all it was worthy of a nice mag article. I have a dedicated collection for the battle of Killiecrankie, 1689 and a fledgling collection for Sharp Practice action in the 1745. I could make do and mend with what I have, for the most part. In previous blog posts you’ve seen me repurposing figures for the Spanish and Dutch troops at Glenshiel. I’m ready to go!
The main Spanish/Jacobite fleet was battered by a 12 day long storm! Another invasion of England defeated by the weather. A separate expedition of only 2 ships with 300 Spanish infantry was to make its way to Scotland. Without any knowledge of the main fleet’s fate, it landed safely on the west coast of Scotland in April 1719.
This little force was commanded by the Earl of Marischal, but the accompanying Marquis of Tullibardine produced a commission from James Stuart giving him seniority. Trumped! This was just one of many things that caused division in the Jacobite command.
Learning of an approaching government army, the Jacobite army, numbering approximately 1400 readied itself. The clans hadn’t turned out in any great numbers (in fact letters had been sent telling the clans to await the Spanish invasion in England. Oops…) and those that had were very unenthusiastic. At least the ships had brought Spanish muskets with them and these were distributed to clans sympathetic to the Jacobite cause.
Marching against the Jacobites was a small pulled together army, about 1300 strong, under the capable General Joseph Wightman. Wightman was about 54 (a good age to be - that’s me at the mo) and a veteran of previous Jacobite naughtiness in 1715.
As they approached the Jacobite army, a small force of Mackenzies under Tullibardine’s little brother, Lord George Murray (you must have heard of him?!), fell back before them.
The date was 10 June 1719. And it was about 4 or 5 in the afternoon when the government army began to deploy and almost immediately attacked.
My map of the deployed armies. There should be a bigger gap between the large group of Mackenzies I’ve got under the Earl of Seaforth on the Jacobite left and the next clan unit. The Spanish are defending an emplacement across the track. Other than Lord George’s isolated command, all the Jacobites occupy emplacements. Lord George’s boys do have the rocky cover of the top of their conical hill though.
“Their Dispositions for Defence were extraordinary, with the Advantages of Rocks, Mountains and Intrenchments.” (Wightman)
The little government army deploys to face the emplaced Jacobite army on the mountainside.
The Jacobite army occupying their emplacements on the mountainside. Top photo show the Jacobite left commanded by the Earl of Seaforth. The bottom photo shows the clan centre. All the units are labelled for the game as they’re not what they usually are. It’ll help the illusion!
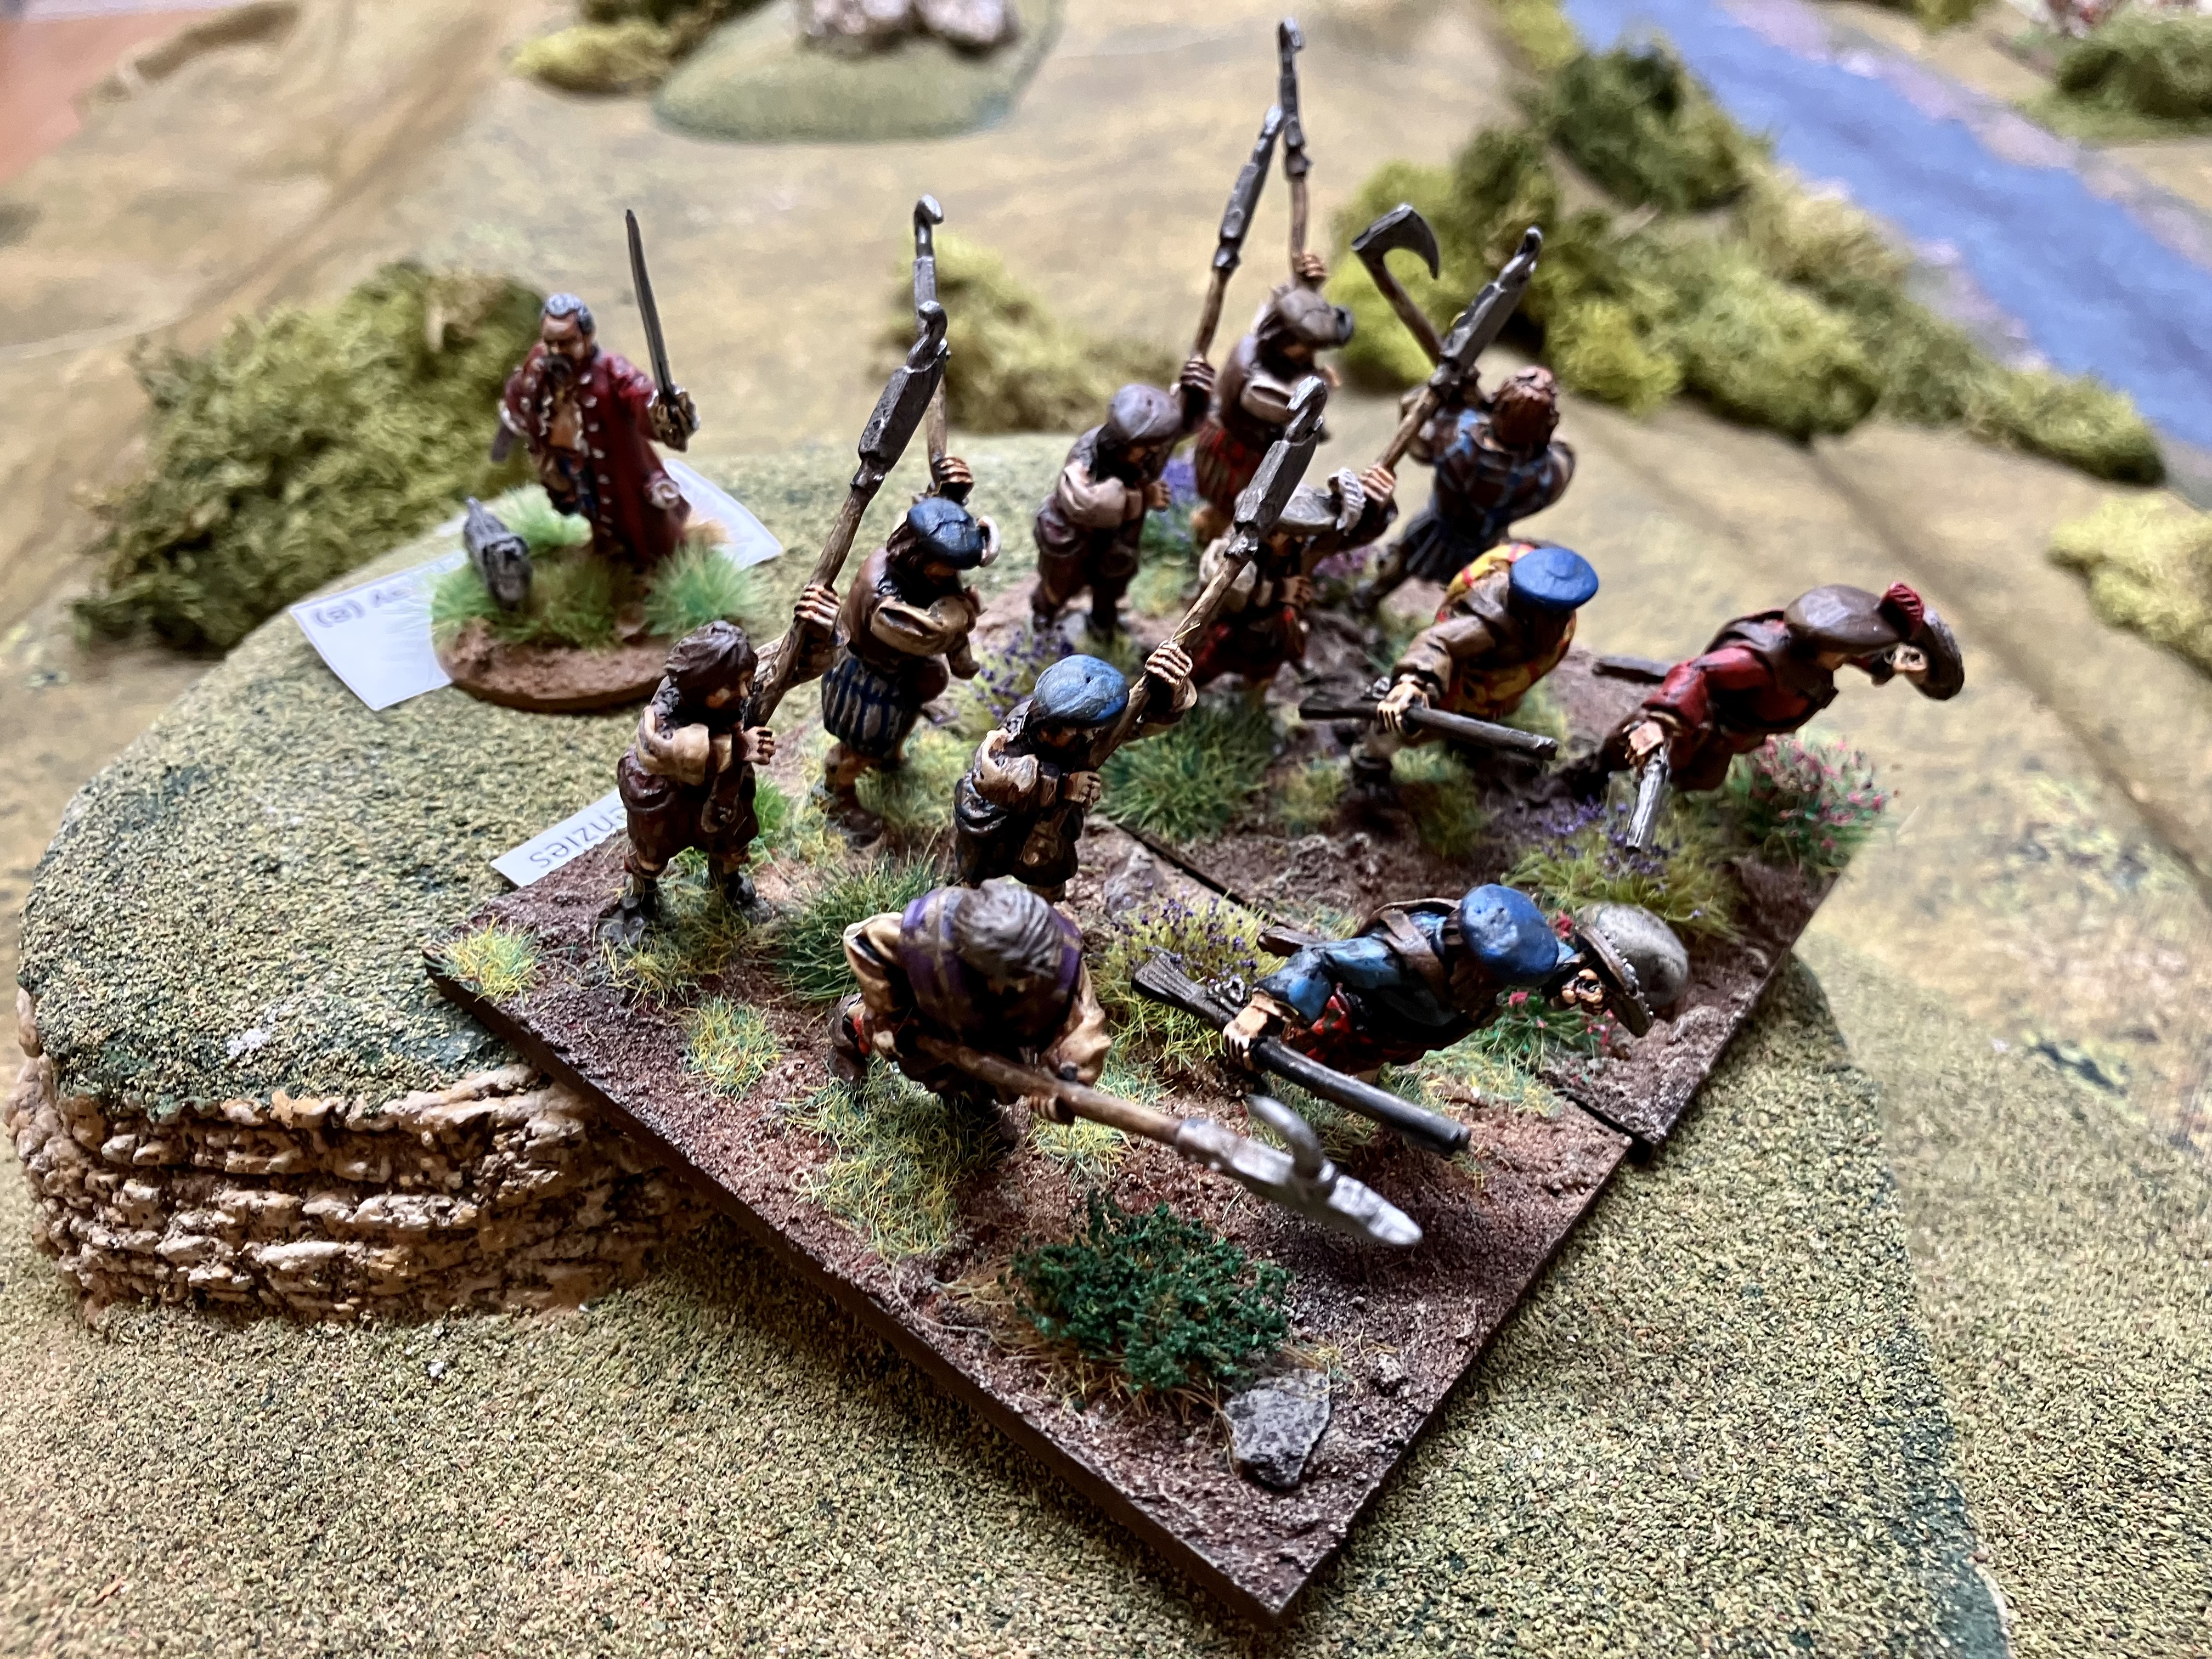
Lord George and his small clan unit at top. You can see the government forces arrayed against his position: Clayton’s Foot, Munroe clansmen and Coehorn mortars! This was the British army’s first recorded use of Coehorn mortars in the field. Easily transportable so the best Wightman could bring with him. Bottom photo shows the Spanish pickets in position.


The government army. Top photo shows the bulk of Colonel Clayton’s command. Clayton was good buddies with Wightman so no friction on this side. I’ve got Wightman commanding the left, the mortars and the dragoons (a composite unit). Clayton commands the rest; Huffell’s Dutch foot (was actually from 2 regiments but that’s unnecessary complication!), Harrison’s Foot (another composite unit), Montagu’s Foot, the grenadiers (naturally a composite unit) and Mackay clansmen. Using Black Powder Pike & Schotte all the government units other than the Dutch are small or tiny! Pike and Shotte doesn’t include rules for tiny units, but it’s easy to include them. And as no units have pike, this is pretty much straight Black Powder.
Tullibardine’s command stand sporting the Royal standard. The brave Spanish in the centre photograph. It’s easy to underestimate their ability/quality, but everything I’ve read suggests they were fine troops. Bottom photo is another shot of Lord George’s command.
We’re all set to go. It’s an all Chris affair; I command the Jacobites while Chris Flowers commands the government forces.
The victory conditions. Government top and Jacobite bottom. Similar but different. To represent the clans’ lack of enthusiasm, all clan units are “untested”; their Stamina is only determined, randomly, when they take their first casualty.
Chris F orders a general advance with Clayton’s command whilst Wightman sends the dismounted dragoons to attack the Spanish and the rest focus on dislodging Lord George’s clansmen. The firing is all a little ineffective.
While Seaforth’s (I know I’ve labelled him Sutherland) clansmen blame the Spanish muskets, the Spanish pickets pour a devastating volley into the dragoons.
Unlike their real counterparts who stormed up the mountain, Clayton’s troops form a firing line. It’s long range firing at a target in cover, but does mean that the Chisholms and Camerons are out of range and not contributing to the return fire.
The Spanish have delivered another excellent volley into to the dragoons and a poor Break Test means they’ve broken! The real dragoons assaulted the Spanish position, but with supporting fire from the Coehorn mortars.
The Coehorn mortars are still busy pummelling the morale of the clansmen on the conical hill. With the musketry from Clayton’s Foot and the Munroe highlanders, and Lord George failing to rally off any casualties, this force breaks. In reality this force did withdraw and played no further part in the battle other than tying up Clayton’s Foot. I think Lord George was shot in the bum!


A view from behind the Dutch! They’re up there! These were genuinely mountainous conditions. The real government troops struggled manfully up to the Jacobite positions on both flanks. No mean feat when you’re not under fire. In my option it is too precipitous for the famous highland charge. I didn’t allow it. I have seen wargame after action reports where the Jacobites have won by charging down from their emplacements. I don’t think that represents the battlefield well. Bottom photo shows the 500 or so Mackenzies seeing off the 50 or so Mackays. That did leave Seaforth’s men out of range of anyone else! And I tried several times to get old Seaforth to go rally casualties off the MacKenzies and Macintoshes. He’d have none of it!
Whoa! Check those dice somebody please! The Coehorn mortars and Clayton’s Foot being mean to the Spanish.
I had to choose where Tullibardine went to rally off casualties. I chose the MacGregors and MacRaes over the Spanish. I needed to keep the clansmen in the fight.
Bother. The Spanish break! Bottom photo shows the firepower ranged against them. The real Spanish covered the retreat and even volunteered to charge the enemy! They surrendered to Wightman the next day as they couldn’t march in Scotland! (One Spanish infantryman had dropped dead from the heat marching to Glenshiel!)


Argh! Two of the clan units break. At this stage we call it. Chris F only needs to break one more clan unit for victory. With the Spanish gone, he can close with his left flank, including the mortars. A government victory is assured! Chris F achieved with long range firepower what the real soldiers achieved by assaulting the Jacobite positions. Job well done!
The state of play as we call it. One line intact… one not so… I’m back to thinking that it’s a difficult one to recreate on the tabletop, but it’s an interesting battle nevertheless and always a pleasure to game with Chris F. Thanks Chris!
Recommended reading on the battle.
All the best
Chris C
(Westerhope Wargamer in exile)


Fantastic post
ReplyDeleteI've been fascinated by this battle for 40 years .Always wanted a few Spanish regiments
What are the base sizes ?
Big Pete
Hi Big Pete. As I borrowed figures from late 17thc and 1745 collection, there are 50mm frontage and 40mm square bases. It didn’t affect game play. Both the suggested reading are very good if you don’t have them. Cheers, Chris
DeleteI have the Helion book and a couple of Spanish language uniform books
DeleteI'm planning to visit the site next year
Looks like I'm going to buy some more figures
Big Pete
I’m pleased to have inspired you! It’s rough terrain. Good luck with that. Cheers, Chris
DeleteHI Chris-good write-up,good figures,good terrain-good result!!
ReplyDeletejohnc
Cheers John. But I lost…?!
Delete