Last night I got my "little one's" out and Dave and I played with them!!-I am of course talking about my 15mm American Civil War figures!!
The scenario and table before any movement-I was Lee,Dave was Meade-the objectives were to capture the supply dump or to stop the supply dump from being captured!
The Cofederate guns open up-I had to try and break up the Union attacks before they got to my lines-this didn't quite work out as I had anticipated(gunners should have gone to Spec Savers!!)
Even under intense artillery fire,the Union troops kept advancing towards their objective!
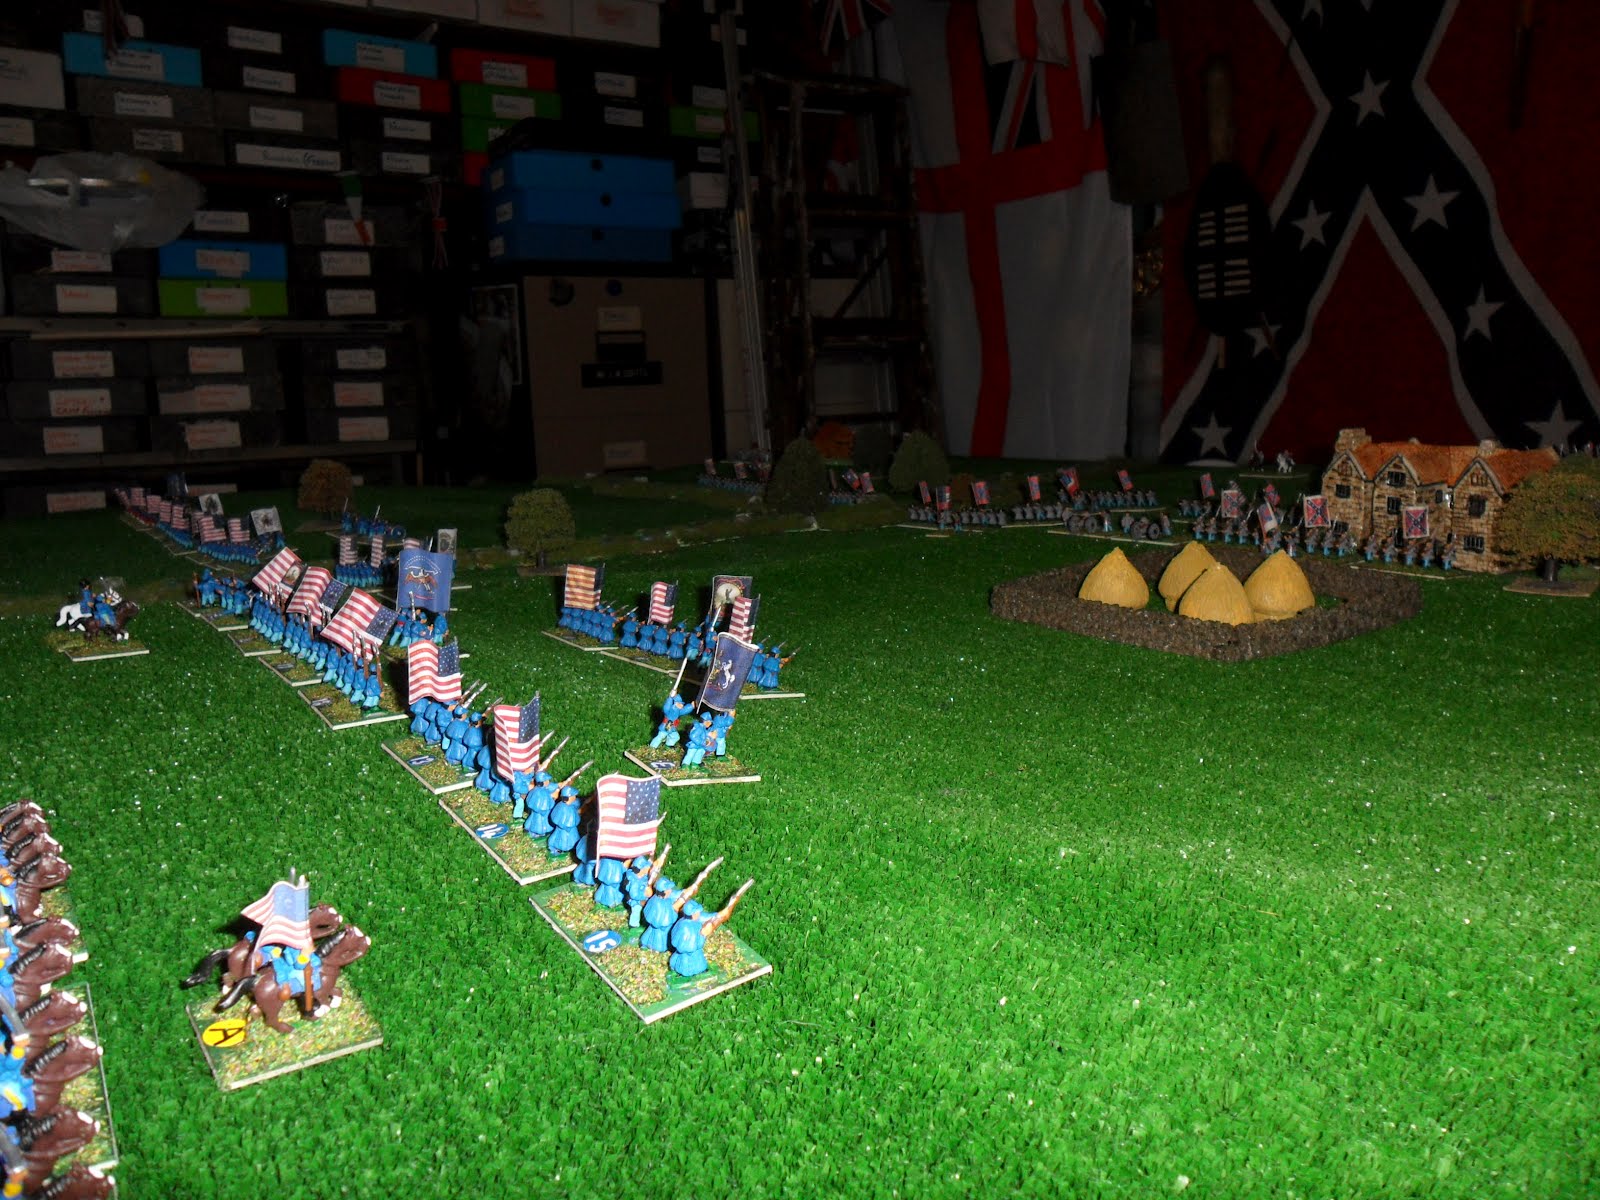
In this shot the "Rebs" are waiting patiently,however,I had ordered two brigades to march to the left,and that is where I was going to make my big push-will it work?
Hmm,Dave had anticipated that move and countered it with Infantry and guns-this was turning into a "cracker" of a game........
The race is on for the field-Dave,always the tactician,sent his cavalry brigade to stop me,he dis-mounted them behind the wall and shot the hell out of me before I could even get into a firing line-the swine!!!
The Union artillery now opened up on my lines,causing havoc-was this the prelude to an all out attack?-surely not(wishful thinking)
I have been driven back,from the walled field,with tremendous losses,and now Dave's main attack is developing in the centre!!
Here it comes!!-the supply dump is being attacked,and my right hand Zouave brigade is being taught a lesson in how to shoot straight-HELP!!
That's the end! Dave has penetrated my centre,defeated both flanks,and has massed his artillery just in case I put in a counter attack(with what??)-I did ask for a draw,but he refused!!
This turned out to be a very lively game,considering the number of figures used and the cut-down table size(6x6)-great stuff.
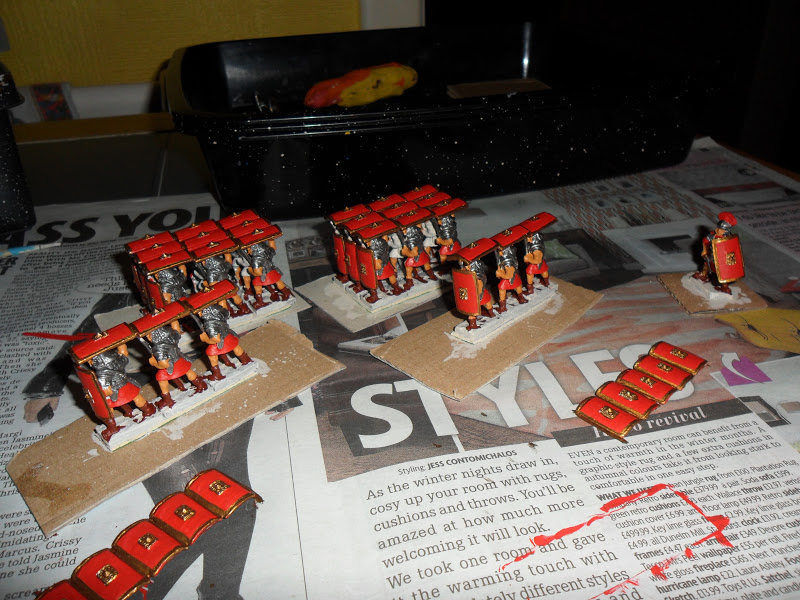
All of the figures are from Warrior Miniatures.
Some good news,just in ,Brian feels well enough to join us on Sunday,so looking forward to seeing him then-don't know what sort of game yet.
Showing posts with label american civil war. Show all posts
Monday, 13 July 2015
Monday, 3 December 2012
American Civil War game 2.12.12.
Last night we had a full compliment (5) playing an A.C.W. game using Dave's figures,and a very exciting game it turned out to be.
Above and below shows the Scenario,and map of initial dispositions,the side with the most points at the end of the game would be the winner.
This shot shows the line getting into position,with Dave's cavalry attempting to stop Paul from moving forward or deploying his guns,this didn't work!!
These are Brian's right flank troops just about to start their ill-fated attack on Graham's troops who had the advantage of being in woods and standing still,however Brian made an heroic attempt three times to get to grips,and caused a little alarm in the Union camp.
Opening shots in the centre,Paul is pushing forward to try and capture the hill,which Dave is defending with guns and infantry.Graham is doing something funny with his hands! as long as he keeps them above the table,we'll be happy!!
Both side are moving into firing lines,while in the background Brian is ferociously attacking Graham.
This shows the battle in full swing on Dave's left flank,this was aparticularly bloody affair with both sides having to rush supporting units and Brigadiers all over the place to maintain "status quo" (well whatever you want!)
This shows Dave's magnificent assault on the Union centre,guns and muskets blazing,neither side willing to retire,and nerves fraying!!
Paul was really pushing hard on the Reb left flank,and, although he had troops retreating,he plugged the gaps in his line and continued the effort,until Dave's brave troops could take no more.
This is the final shot,Brian's troops are broken and retiring in sectors,and Dave's cetntre attack has failed,due partly to Paul's wonderful positioning of his gun battery,which enfiladed any troops silly enough to show themselves! Graham was just about to move his forces out of the wood and counter attack Brian,so it was decided that the game was over,and the Union army had won a decisive victory,
Well done to all players,a colourful and exciting game,roll on Thursday.
Before the game started we all "OOH'D and ARR'D" over Dave's painting of this great one-piece-casting from Elite.
Above and below shows the Scenario,and map of initial dispositions,the side with the most points at the end of the game would be the winner.
The above photo shows the "Reb" column snaking its way towards the central hills,with Brian waiting for his troops to start their attack on the far hill.Both sides had decided to ignore the hill with the "mountain" on it and this set the tone for the battle to rage along the centre and far edge of the board.
It must,at this point ,be pointed out that I didn't play last night because my "gammy" knee was playing up,so Brian and Dave were Rebel commanders whilst Paul and Graham were Union commanders.
These are Brian's right flank troops just about to start their ill-fated attack on Graham's troops who had the advantage of being in woods and standing still,however Brian made an heroic attempt three times to get to grips,and caused a little alarm in the Union camp.
Opening shots in the centre,Paul is pushing forward to try and capture the hill,which Dave is defending with guns and infantry.Graham is doing something funny with his hands! as long as he keeps them above the table,we'll be happy!!
Both side are moving into firing lines,while in the background Brian is ferociously attacking Graham.
This shows the battle in full swing on Dave's left flank,this was aparticularly bloody affair with both sides having to rush supporting units and Brigadiers all over the place to maintain "status quo" (well whatever you want!)
This shows Dave's magnificent assault on the Union centre,guns and muskets blazing,neither side willing to retire,and nerves fraying!!
Paul was really pushing hard on the Reb left flank,and, although he had troops retreating,he plugged the gaps in his line and continued the effort,until Dave's brave troops could take no more.
This is the final shot,Brian's troops are broken and retiring in sectors,and Dave's cetntre attack has failed,due partly to Paul's wonderful positioning of his gun battery,which enfiladed any troops silly enough to show themselves! Graham was just about to move his forces out of the wood and counter attack Brian,so it was decided that the game was over,and the Union army had won a decisive victory,
Well done to all players,a colourful and exciting game,roll on Thursday.
Before the game started we all "OOH'D and ARR'D" over Dave's painting of this great one-piece-casting from Elite.
Friday, 16 November 2012
American Civil War.15.11.12.
Last night we had a real change in our game,we used my 15mm A.C.W. figures!
I had picked sides earlier,and Paul and Brian were the Union commanders whilst I was in charge of the Confederates.We used our all-encompassing rules which,we found,adapted very well.
Above is the scenario and map showing start positions,we agreed that I couldn't react to Brian's move towards the ford,until he had actually crossed the river,however I did have a handy reserve placed behind my main hill.
This is the overall view of the table,with the Union troops of Paul on the right,and Brians outflanking column in the background,"snaking" towards my left flank.
This is a shot of Brian's column made up of cavalry,guns and infantry,the ruined bridge is in the foreground.
My initial advance towards Paul's position on his hill,is shown here,although I had a great advantage of numbers,I was continually aware that I would need troops to combat Brian's push on the flank.
Brian's troops are crossing the river in numbers now,he made a dash for my reserve cavalry,and set up a gun battery too close to my position,just out of shot on his left flank,and he was to suffer a couple of cannister shots before he was able to take the position.
This shot is of the centre,where Paul and I were still slogging it out,he managed to get more units into his firing line than I did,and inflicted enough casualties to force me to take morale. A couple of my units broke,and I decided to pull my whole line back to their original positions.
Brian's cavalry hitting my,dismounted, cavalry,I managed to get a shot at him before he made contact,which proved to be important later on,I also had a brigade of Zouaves on his flank,which I had to put into the melee once it was "static".
This shot shows my position,on Brian's left flank,defended by dismounted cav. and a battery of guns,and in the background some infantry which I had to withdraw to try and support my position,from a tremendous attack from Brian.
Brian has broken into my position!! after morale was checked,most of my troops ran away,and left Brian in possesion of the position.
This is a shot showing my infantry defending the town, against a determined assault from Paul's troops,I managed,somehow, to hold on in the town,and with my infantry now back in their original starting position,Paul was in a precarious state,with his troops scattered around the centre.
This shows my cavalry capturing one of Brian's gun batteries,by a daring sweep around his flank,this move placed me behind his cav. and inf. although he had taken my defended position.Because of this set of circumstances,we decided that a draw was afair result.Paul being able to regroup in the centre,and possibly start a new offensive.This was another good game,everyone went away happy.what more could you ask for ?? A WIN !!!
roll on Sunday.
Final photo,completed Testudo,just one more to go!!
Friday, 25 May 2012
Battle of Twin Forks,1862 A.C.W. game 24.5.12.
Paul and I had the first game with my 15mm American Civil War figs. last night, and to celebrate I went right back to the very first game I ever had,back in 1972, called Twin Forks.(it's funny how you never forget that first game!) The scenario was very simple,the Union forces were to attack a Cotton Mill at Twin Forks,the Confederate troops were to stop them.This game also gave us the opportunity to see how our 25mm rules would transfer to 15mm-no problem as it turned out,although using Brigades and not regiments confused me at first,but Paul in his usual style took everything in his stride and kept me right!!
I have included these photographs showing the game in various stages,it felt right and looked right,and we enjoyed the game,and will play test a few more times before letting the rest of the club involve themselves in this fascinating period,or maybe I will just keep these figs. for solo gaming,we'll see.
This is a shot of the Union lines ready to advance,you can see the Mill in the distance on the right,fronted by a field full of haystacks,this field saw some of the most intense fighting,the Confederates managed to hold onto it until the end of the game.
This is the Confederate's centre,brigades of infantry backed up with artillery.My attack was right up this formidable hill,a nd turned out to be very successful, after continued fire-fights and melees.
Another shot of the Rebel centre before the game started,cavalry is hidden just behind the Mill,we allowed a cavalry melee to take place just to see how the rules worked.(they obviously didn't,cos I lost!!)
Union lines in full advance,in the foreground is my Left flank,which had orders to drive the Rebs away from a ruined house situated across a stream and up a hill,no easy task and my troops did suffer,however they persevered and managed,not only to capture a battery of guns,but to drive away the famous "tiger" zouaves.

This is the evidence! "tigers" running away being chased by the New York zouaves,meanwhile the Confederates are holding my brigade on the right of the picture.

The Rebs have driven my brigade back,but in doing so have placed themselves at a disadvantage as I am now in their rear out of picture to the left.
This shows the successful Union troops taking the Confederate's central position,although the field is still occupied by them,eventually surrounded,they too had to give in.
All in all,this was a good game,and brought back good memories for me,hopefully we will play this period more often,be it in 25mm or 15mm.
I have included these photographs showing the game in various stages,it felt right and looked right,and we enjoyed the game,and will play test a few more times before letting the rest of the club involve themselves in this fascinating period,or maybe I will just keep these figs. for solo gaming,we'll see.
This is a shot of the Union lines ready to advance,you can see the Mill in the distance on the right,fronted by a field full of haystacks,this field saw some of the most intense fighting,the Confederates managed to hold onto it until the end of the game.
This is the evidence! "tigers" running away being chased by the New York zouaves,meanwhile the Confederates are holding my brigade on the right of the picture.
The Rebs have driven my brigade back,but in doing so have placed themselves at a disadvantage as I am now in their rear out of picture to the left.
Roll on Sunday.I don't know if you realise it but today is only 7months until Christmas,so get your "pressie" list written out and given to your loved ones a.s.a.p.
Tuesday, 22 May 2012
Sunday's game,Ancients.20.5.12.
For Sunday's game we decided on a Carthaginian vs Republican Roman game,because of shifts etc. Robin couldn't make it so it was Grham and Paul against me (John).I commanded the Romans and P & G split the Carthaginian command between them.
The game started with a mass charge by the Elephants,countered by a charge of the Roman first line of Hastati, we give Elephants a very high first clash value,and the Hastati a fairly low value,so even throwing their pila and inflicting some casualties among the Elephants,the result was a far gone conclusion ! I exchanged lines, and my Princepes took over the task of fighting the dreaded Elephants and following lines of Spanish,Africans and Celts.After a real tussle the Romans were beaten and the Triarii wwere called upon to sort the Roman mess out, guess what?? yes they too,even with a good value against them and veteran status,were beaten.
Below is the Roman line before the battle started,Legions in the centre with velites out in front,and cavalry (don't even mention the cavalry!) on thye flanks,my far right flank was held by some light inf. and cav. but they were faced by the terrible Numidians, and of course in time decided to run away,leaving me exposed!!
This shot shows the Carthaginians with Elephants out in front,with lines of African heavy inf. Spanish troops and the Celts,flanked by super cavalry.
This shows the battle in full swing, with the Romans being put under alot of pressure on every front,in the top right hand corner of this shot you can see the Roman cav. being pushed off the board by persuing Carthaginian cav.
I thought I would include this photograph in the hope that any one recognising this,obviously "care in the community patient",would come and collect him and give him his medication as quickly as possible!!

More of the same,Romans being beaten by lucky dice throwing,no other reason for me losing!
Note the Triarii are fighting,never heard of before.
This shot shows the "debacle" that was the Roman right flank,horse archers fleeing and light inf. being beaten to a pulp.
However on a happier note,I finished painting my A.C.W. armies and sent to Warrior Miniatures for some Zouaves,I sent the order on Thursday the 17th. and got the order on Saturday the 19th !! how about that for service?
The game started with a mass charge by the Elephants,countered by a charge of the Roman first line of Hastati, we give Elephants a very high first clash value,and the Hastati a fairly low value,so even throwing their pila and inflicting some casualties among the Elephants,the result was a far gone conclusion ! I exchanged lines, and my Princepes took over the task of fighting the dreaded Elephants and following lines of Spanish,Africans and Celts.After a real tussle the Romans were beaten and the Triarii wwere called upon to sort the Roman mess out, guess what?? yes they too,even with a good value against them and veteran status,were beaten.
Below is the Roman line before the battle started,Legions in the centre with velites out in front,and cavalry (don't even mention the cavalry!) on thye flanks,my far right flank was held by some light inf. and cav. but they were faced by the terrible Numidians, and of course in time decided to run away,leaving me exposed!!
More of the same,Romans being beaten by lucky dice throwing,no other reason for me losing!
Note the Triarii are fighting,never heard of before.
I had the figures painted,based and flocked by Monday the 21st,so was very pleased. As I mentioned before on a previous blog,I haven't painted any detail on these figs. but I'm pleased with the finished result.(if you look carefully you can see I even managed to put stripes doen the trousers of the "Tigers"
The first shot is of the Louisiana Tigers,but I am just classing them as a Zouave brigade.
This photo shows the Union counterpart Zouave brigade,painted as the New York Zouaves,very colourful.
This is a shot of the N.Y. zouaves from behind.
The first shot is of the Louisiana Tigers,but I am just classing them as a Zouave brigade.
The amount of detail on these diminuitive figs. is astounding,if only I had the skill or patience to do them justice!!
I have sent away for some limbers and horses for the artillery,and a few civilian figs. too.I will keep you up to date with them when they arrive.
Subscribe to:
Posts (Atom)